Tutorials
How To Fix Lag On Ark Survival Evolved? [Guide]
Ark: Survival Evolved is one of the most popular dinosaur survival games out there. Who doesn’t love taming and riding around on dinosaurs after all? However, as fun as the game is, many players struggle with lag issues that seriously impact their gameplay experience.
Lag can cause major disruptions like rubberbanding, teleporting players/dinos, button presses not registering properly, and more. This lag leads to an unenjoyable and frustrating experience, especially during critical moments like boss fights or PVP.
The good news is there are various ways you can fix lag in Ark to get that smooth gameplay you desire. In this guide, we will go over all the major tweaks and optimizations you can make on both the hardware and network side to eliminate lag and stuttering in Ark: Survival Evolved.
Hardware Related Fixes for Ark Lag
Let’s first look at some ways you can optimize your hardware to improve Ark performance and fix lag issues:
Upgrade PC Components If Below System Requirements
Ark is a pretty demanding game when it comes to hardware, especially if you have all the graphics turned up. So the first thing you should look at is whether your PC actually meets the minimum and recommended system requirements for the game:
Minimum
- CPU: Intel Core i5-2400 or AMD FX-8320
- RAM: 8 GB
- GPU: Nvidia GTX 670 2GB or AMD Radeon HD 7870 2GB
Recommended
- CPU: Intel Core i7-5820K or AMD Ryzen 5 1500X
- RAM: 16 GB
- GPU: Nvidia GTX 980 4GB or AMD Radeon R9 290X 4GB
If your PC falls below these specs, especially in terms of CPU and GPU power, it will struggle to run Ark properly leading to major lag and stuttering. Upgrading to a modern budget CPU like the Ryzen 5 3600 along with a powerful mid-range GPU like the RTX 3060 or RX 6600 XT will work wonders.
Adding more RAM if you have only 8GB can also help as Ark loves to eat up memory. 16GB is the sweet spot for stable Ark performance.
Lower In-Game Graphics Settings
Simply meeting the recommended system specs doesn’t mean you can crank up Ark’s graphics to Epic. The game is poorly optimized so it’s generally better to play at Medium to High settings for the smoothest experience.
Start by lowering your resolution if you play at 1440p or 4K. At 1080p, begin reducing settings like Lighting Quality, Shadow Quality, Effects, Post Processing and Anti-aliasing. Turn off motion blur. Tweak these settings and find an optimal balance between visuals and frame rate.
Close Unnecessary Background Apps
Leaving apps running in the background while you game puts extra load on your PC and eats up valuable resources leading to lag spikes and stuttering. Be sure to close any unnecessary programs before firing up Ark.
Web browsers, video/music playback software, RGB lighting apps are some examples of programs you should shut down. Use Task Manager to monitor your CPU and RAM usage – if either is hitting 100% usage then you likely have background apps that are hogging resources.
Check for Malware and Viruses
Sometimes lag and performance issues arise not due to Ark, but because your PC is infected with malware or viruses that run tasks in the background, slowing everything down.
Run a full system scan using Windows Defender or your preferred antivirus software. Also download and run Malwarebytes Anti-Malware for a second opinion. Remove any threats detected. Keep your antivirus updated and run periodic scans.
Network Related Fixes for Ark Lag
Now let’s go over some network tweaks and troubleshooting steps you can take to reduce lag caused by connection issues:
Use Wired Connection Instead of WiFi
WiFi connections are convenient but come with inherent stability issues due to interference and signal degradation over distance. This can frequently manifest as lag spikes, rubberbanding and poor performance in online games like Ark.
The ideal solution is to use a wired Ethernet connection for gaming which provides reliable low ping and high speeds. If your router is far away, look into Powerline adapters which transmit data over your home’s electrical wiring.
Gaming over WiFi should be a last resort. If you must use WiFi, try to get an 802.11ac router and connect over the 5GHz band instead of congested 2.4GHz. Stay close to the router and minimize obstructions between you and the router.
Pause Downloads and Video Streaming
Background downloads, video streaming, large file transfers etc can congest your network bandwidth leading to major lag spikes in Ark.
Pause any non-essential bandwidth heavy tasks before joining your Ark server. Make sure cloud sync clients like Google Drive, game platforms like Steam/Origin/Epic Games are not downloading game updates either.
If you have housemates who stream 4K Netflix while you play, request them to throttle their bandwidth or only stream at non-peak times. Streaming at 720p takes up way less bandwidth versus 4K.
Upgrade Old Network Hardware and Cabling
Using outdated network hardware like an ancient router from 2010 or damaged Ethernet cabling can also cause random lag and rubberbanding issues.
Replace your router if it’s more than 5 years old for something more modern with stronger WiFi, better traffic management and stability. Swap out those old Cat5e cables for new Cat6 or Cat7 cables to eliminate any cabling issues.
Forward Ports for Ark
By default, your router blocks incoming connection attempts for security reasons. This can negatively impact your Ark ping and cause lag spikes.
You can resolve this by forwarding the necessary ports required by Ark in your router’s settings. Refer to your router manual on how to do this correctly. Make sure UPnP is enabled on your router first before forwarding ports. Forwarding ports is a moderately complex process, so search for a tutorial specific to your router model.
Limit Your Tamed Dinos
Having hundreds of dinos can make your server laggy due to the resource strain – every dino has an impact on performance. Limit your tames to only what’s necessary to reduce lag.
Convince the server admin to install mods like Dino Decay which automatically culls unused tames over time. Also disable dino resource harvesting to improve FPS.
Use Launch Options like -sm4 or -d3d10
Ark supports launch options that can disable certain graphical features and optimize CPU/GPU usage for better performance.
Try launching with -sm4 which forces DX10 mode and reduces load. -d3d10 also does something similar. Experiment between the two and see if it makes a difference.
Steam guide here on how to set launch options correctly in your Steam game library for Ark.
Cap Your FPS at 30 if Stuttering
On weaker PCs, uncapped FPS can lead to heavy stuttering in Ark as your FPS keeps swinging wildly up and down based on the scene.
Capping your FPS around 30 fps using external tools like RivaTuner Statistics Server can help provide a smoother experience by reducing oscillations.
Tweak Graphics Settings
Besides the basics we covered earlier, you can disable some specific graphics options known to affect Ark performance:
- Light Shafts – Turn this off to gain up to 20 FPS
- Motion Blur – Disabling this can reduce lag spikes when quickly looking around
- Subsurface Scattering – Removes those fuzzy outlines you see – eats FPS
- Spot Light Shadows – Turn off for 5-15 FPS boost
Experiment with toggling these settings on and off to see if it improves your FPS stability and lag.
Reset Network Devices
In some cases, random severe lag spikes and rubberbanding can occur due to network instability issues beyond your control.
As a troubleshooting step, try resetting your network equipment like the modem, router, network switch/hub to see if it resolves these intermittent latency spikes.
Limit Auto Turrets on PVP Servers
Having tons of auto turrets on PVP servers causes intense lag and FPS drops from all their rapid firing calculations.
Ask the admin to restrict turret count to a reasonable number like 20 max per tribe for better server performance. Limit your own turrets too.
Software Tweaks to Fix Ark Lag
Aside from hardware and network related fixes, you can also use various software optimizations to reduce lag in Ark:
Install Mods Like Better FPS
Specialized mods like Better FPS can help optimize Ark performance through tweaks the game engine and graphics settings. Installing this can potentially fix a lot of lag issues.
Other useful optimization mods include Tidy Save and No Wandering On.
Keep GPU Drivers Updated
Having outdated or buggy GPU drivers can negatively impact Ark performance leading to lag. Regularly update to the latest Nvidia or AMD drivers through GeForce Experience or Adrenalin Software respectively. Perform a clean driver install if needed.
Update Windows and Background Apps
Lastly, make sure your Windows version is fully updated using Windows Update and all background apps/software like browser, Discord etc are also updated. Old buggy software can slow down your system. Consider disabling real-time antivirus protection as that can sometimes cause lag spikes.
General Tips to Reduce Ark Lag
Here are some other miscellaneous tips to help optimize Ark performance and reduce lag:
- Restart your game and PC before long play sessions to clear any background clutter.
- Verify integrity of Ark files on Steam if you face sudden lag issues to fix any corrupted game file errors.
- Don’t overload your PC with other intensive tasks like video rendering while playing Ark.
- Set Ark’s CPU priority to High in Task Manager so it gets resources priority over other processes.
- Overclock your CPU, RAM and GPU (if supported) for extra performance headroom.
- Use launch parameter
-lowmemoryif you have only 8GB RAM.
Conclusion
Lag and stuttering can ruin the Ark: Survival Evolved experience, turning epic dino battles into a glitchy mess. Thankfully, there are a ton of optimizations you can make, as outlined in this guide, to eliminate lag and achieve smooth high FPS gameplay.
The key things to remember are:
- Upgrade your PC hardware if it’s outdated or underpowered
- Lower graphics settings and use performance enhancing mods
- Optimize your network connection – use Ethernet over WiFi
- Tweak Ark’s config files and enable performance launch parameters
- Limit unnecessary background resource usage while playing
Focus on the fixes most relevant to you and test them out. With some trial and error, you should be able to pinpoint the culprit behind your Ark lag woes and get it resolved. No more pesky rubberbanding or stuttering during those intense PVP sieges!
Lastly, don’t forget that in-game graphics settings have the biggest impact on Ark performance and fine-tuning those is critical for a lag-free experience.
Let us know in the comments if you have any other tips for optimizing Ark performance and fixing lag issues!
Tutorials
How to Fix 0xc0000142 Error on Windows 10: Easy Step-by-Step Guide
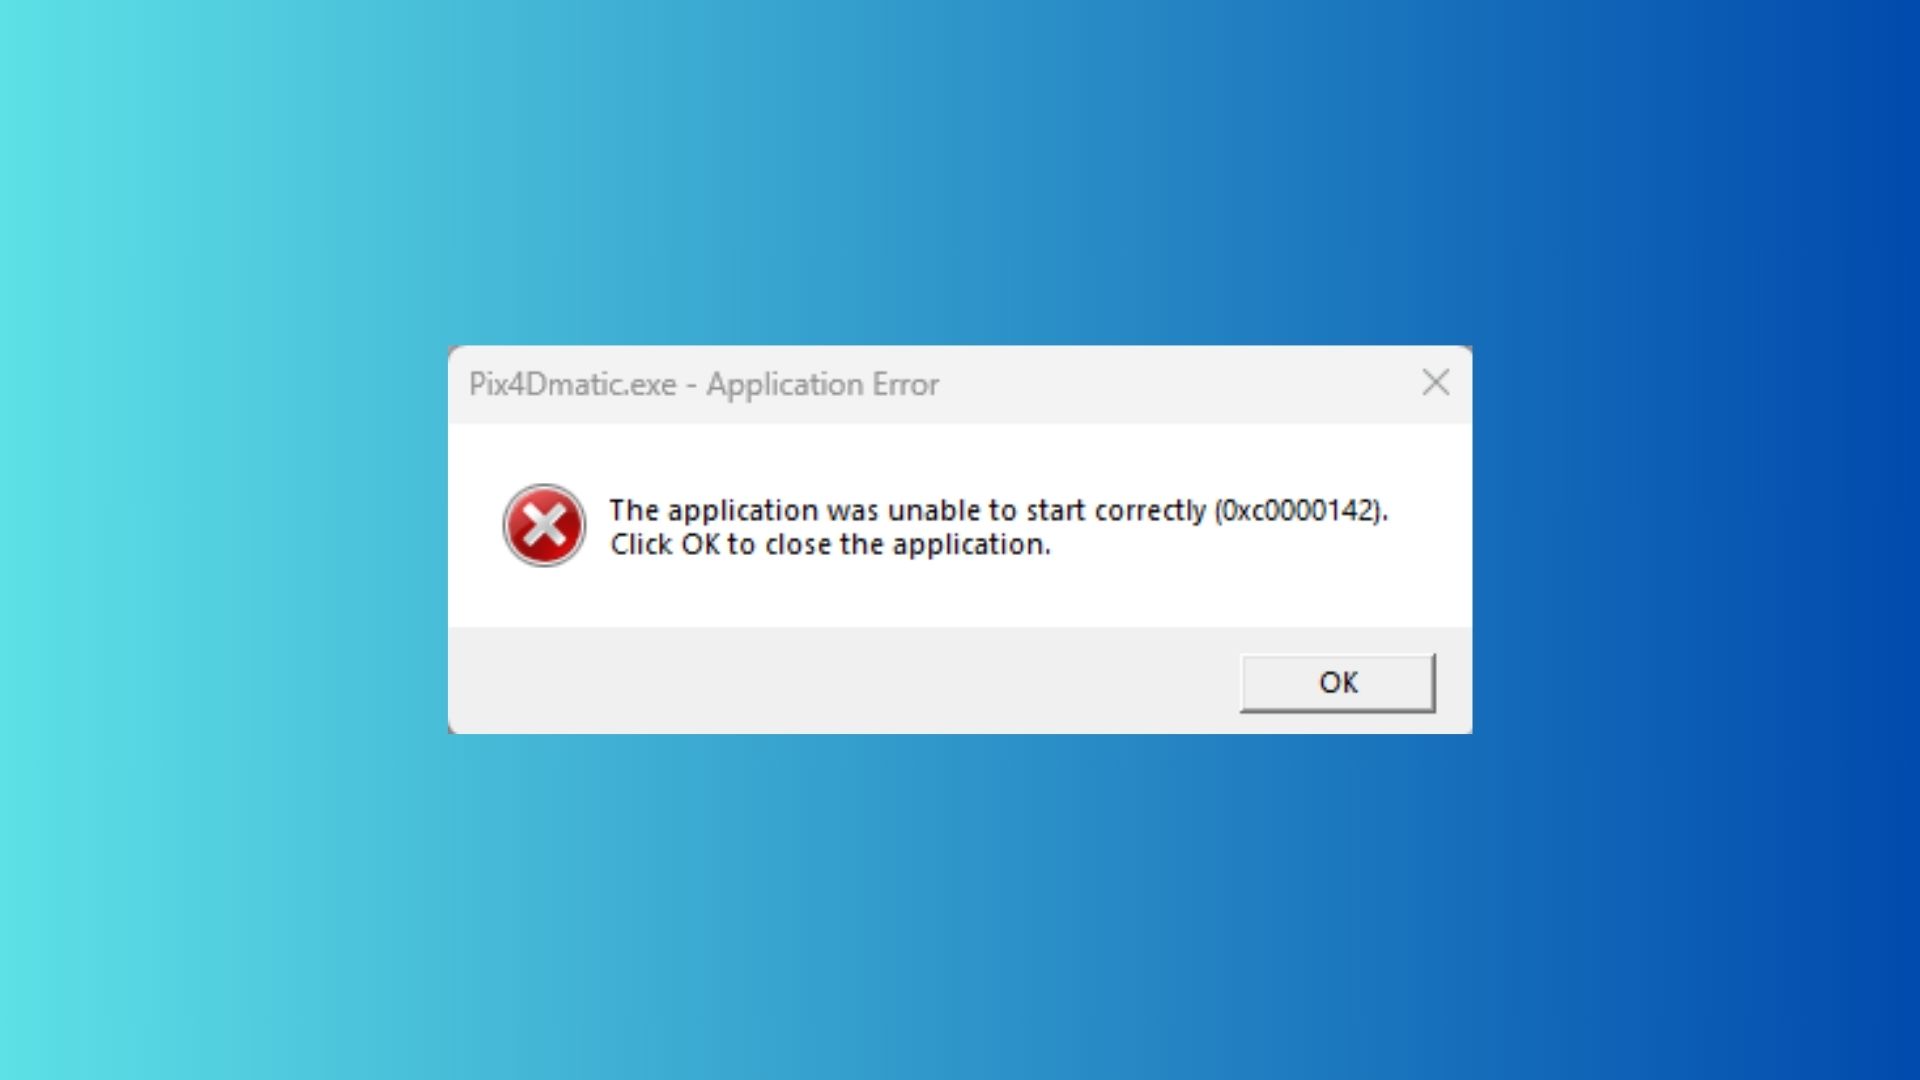
Ever fired up your favorite game, only to get slapped with the frustrating 0xc0000142 error on Windows 10? It’s like your PC is throwing a tantrum, refusing to launch your app or game. Don’t worry—you’re not alone, and there’s a fix that works like a charm. I’ve been there, and after a clean Windows 10 install and some key software setups, I got rid of this error for good. Stick with me, and I’ll walk you through every step to banish this error and get back to gaming or working smoothly. Ready to dive in? Let’s fix that 0xc0000142 error together!
Key Takeaways
- The 0xc0000142 error stops apps or games from launching due to corrupted files, missing DLLs, or outdated drivers.
- A clean Windows 10 installation using a USB created with Rufus can fix the issue.
- Installing Visual C++, DirectX, and .NET Framework 4.8 after the clean install is crucial.
- Adding a free antivirus like Bitdefender helps keep your system secure.
- Regular updates and safe software practices prevent the error from coming back.
Short Answer to Fix 0xc0000142 Error
The 0xc0000142 error usually pops up when your system is missing key files or has corrupted ones, especially for games. The best fix? Do a clean Windows 10 install using a USB made with Rufus and the official Windows 10 ISO. After that, install Visual C++, DirectX, .NET Framework 4.8, and a free antivirus like Bitdefender. This combo wipes out the error and keeps your PC running smoothly.
What Causes the 0xc0000142 Error?
So, what’s behind this annoying error? The 0xc0000142 error happens when an application—often a game like GTA V or Call of Duty—can’t start because something’s gone wrong with your system. Think of it like trying to start a car with a missing spark plug. The main culprits are:
- Corrupted system files: Windows files get damaged, maybe from a bad shutdown or malware.
- Missing DLLs: These are tiny files apps need to run, and if they’re gone, you’re stuck.
- Outdated drivers: Old graphics or system drivers can mess things up.
- Incompatible software: Some programs just don’t play nice with Windows 10.
This error loves to crash the party when you’re trying to game, but don’t sweat it. A clean install and some software updates will get you back on track. Curious about how to do it? Let’s break it down.
How to Perform a Clean Windows 10 Installation
A clean install is like giving your PC a fresh start. It wipes out all the junk and errors, including that pesky 0xc0000142. Here’s how to do it, step by step. Don’t skip any part, and you’ll be golden.
Step 1: Download the Latest Windows 10 ISO
First, you need the official Windows 10 ISO file, which is like the blueprint for your new system. Head to Microsoft’s official website and grab the Media Creation Tool. This tool is super easy to use, even if you’re not a tech wizard.
- Open the Media Creation Tool and select “Create installation media for another PC.”
- Choose your language, Windows 10 edition (usually Home or Pro), and 64-bit architecture.
- Pick “ISO file” and save it to your computer. This file is big, so make sure you’ve got a few gigs of free space.
This ISO is your ticket to a fresh Windows install. Got it downloaded? Awesome, let’s move on.
Step 2: Create a Bootable USB with Rufus
Now, you’ll turn that ISO into a bootable USB drive using Rufus, a free tool that’s dead simple to use. You’ll need a USB drive with at least 8GB of space—make sure it’s empty because this process wipes it clean.
- Plug in your USB drive and open Rufus.
- Select your USB drive from the list at the top.
- Click “Select” and find the Windows 10 ISO you downloaded.
- Keep the default settings (like NTFS file system) and hit “Start.” This takes a few minutes, so grab a snack.
- When it’s done, you’ll have a USB ready to install Windows 10.
Your USB is now a magic wand for fixing your PC. Ready to use it? Let’s keep going.
Step 3: Format Hard Drive and Install Windows 10
Here’s where things get real—you’re going to wipe your hard drive and install a fresh Windows 10. But first, back up your files! Photos, videos, game saves—copy them to an external drive or cloud storage like Google Drive. Once you’re backed up, follow these steps:
- Plug your USB into your PC and restart it.
- Enter your PC’s BIOS by pressing a key like F2, F12, or Delete during boot (check your PC’s manual for the exact key).
- Set the USB as the first boot device in the BIOS.
- Save and exit. Your PC will boot from the USB.
- Follow the Windows 10 setup prompts: choose your language, click “Install Now,” and enter your product key (or skip it if you don’t have one).
- Select “Custom: Install Windows only” to do a clean install.
- Delete all partitions on your main drive (where Windows is installed) and select the unallocated space to install Windows. This formats the drive, wiping everything.
- Let Windows install. Your PC will restart a few times—don’t panic, it’s normal.
Once it’s done, you’ll have a brand-new Windows 10 setup. No more 0xc0000142 error… yet. We’ve got a few more steps to lock it in.
Step 4: Post-Installation Setup
Your fresh Windows is like a blank canvas—it needs some key software to run games and apps without errors. Here’s what to install, and why it matters.
Install Visual C++ Redistributables
Visual C++ is like the glue that holds many games and apps together. Without it, you’ll get errors like 0xc0000142. Go to Microsoft’s Visual C++ download page and grab the latest versions (usually 2015-2022, both x86 and x64).
- Download and run the installer.
- Follow the prompts to install. It’s quick and painless.
- Restart your PC if prompted.
This step fixes missing DLL issues that cause the 0xc0000142 error. Done? Let’s move to the next piece.
Install DirectX
DirectX is a must for gaming—it helps your graphics card talk to games. Without it, games might not launch, or you’ll see that dreaded error. You can get it from Microsoft’s DirectX page or TechPowerUp.
- Download the DirectX End-User Runtime Web Installer.
- Run it and let it install the latest DirectX components.
- Restart your PC to make sure everything’s set.
This ensures your games run smoothly. One more key install to go.
Install .NET Framework 4.8
.NET Framework is another behind-the-scenes helper that apps and games need. Head to Microsoft’s .NET Framework 4.8 download page and grab it.
- Download the installer and run it.
- Follow the prompts to install. It’s straightforward.
- Restart your PC if needed.
This fixes compatibility issues that can trigger the 0xc0000142 error. Almost there!
Install Bitdefender Free Trial (Optional)
To keep your PC safe from malware that can cause errors, install a good antivirus. I used Bitdefender’s free 30-day trial, and it’s awesome for catching threats without slowing your system. Go to Bitdefender’s website to download it.
- Download the free trial installer.
- Run it and follow the setup wizard.
- Let Bitdefender scan your system to catch any lurking issues.
This step isn’t mandatory, but it’s a smart move to keep your PC clean. Want to know if it worked? Let’s test it.
Step 5: Test Games and Applications
Now it’s time to see if the error’s gone. Fire up the game or app that was giving you the 0xc0000142 error. For me, after installing Visual C++, DirectX, and .NET Framework, every game launched perfectly. If it works, you’re done! If not, double-check that you installed all the software correctly or try updating your graphics drivers from your GPU maker’s website (like NVIDIA or AMD).
How to Avoid 0xc0000142 Errors in the Future
You’ve fixed the error, but how do you keep it from coming back? Here are some easy tips to keep your PC running like a dream:
- Update Windows regularly: Go to Settings > Update & Security and check for updates. New patches fix bugs that cause errors.
- Stick to trusted software: Don’t download sketchy apps from random websites—they can mess up your system.
- Keep drivers fresh: Update your graphics and other drivers from the manufacturer’s site.
- Run system checks: Use commands like
sfc /scannowin Command Prompt to fix corrupted files. You can also useDISM /Online /Cleanup-Image /RestoreHealthfor deeper repairs. - Use an antivirus: Stick with Bitdefender or another trusted antivirus to block malware that corrupts DLLs.
Follow these, and you’ll keep that 0xc0000142 error in the rearview mirror. But what if you have more questions? I’ve got you covered.
Frequently Asked Questions
What is the 0xc0000142 error in Windows 10?
It’s an error that stops apps or games from launching, usually because of missing or corrupted files like DLLs, outdated drivers, or broken system files.
Can I fix 0xc0000142 without reinstalling Windows?
Sometimes, yes—try updating Visual C++, DirectX, or drivers. But a clean install, like described here, is the most reliable fix for stubborn cases.
Is it safe to format my hard drive?
Yes, as long as you back up your files first. Formatting wipes everything, so save photos, videos, and game saves to an external drive or cloud.
Why do I need Visual C++ and DirectX for games?
These are like toolkits games use to run properly. Without them, you’ll get errors like 0xc0000142 because the game can’t find the files it needs.
How does Bitdefender help prevent errors like 0xc0000142?
Bitdefender stops malware that can corrupt system files or DLLs, which are common causes of the 0xc0000142 error.
Final Thoughts on Fixing 0xc0000142 Error
Dealing with the 0xc0000142 error is a pain, but a clean Windows 10 install, paired with the right software like Visual C++, DirectX, and .NET Framework, can make it disappear. I’ve walked you through every step, from downloading the Windows ISO to testing your games. Just make sure to back up your files before formatting, and you’ll be back to gaming or working in no time. Did this fix work for you? Drop a comment below or hit me up for more tech tips. Let’s keep those errors away for good!
Tutorials
Fix Epic Games Launcher Setup Ended Prematurely 2025
![[SLOVED] How To FIX Epic Games Launcher Setup Wizard Ended Prematurely](https://gamesreq.com/wp-content/uploads/2024/12/SLOVED-How-To-FIX-Epic-Games-Launcher-Setup-Wizard-Ended-Prematurely.webp)
How to Fix Epic Games Launcher Setup Wizard Ended Prematurely
Are you stuck with the annoying “Setup Wizard Ended Prematurely” error while installing the Epic Games Launcher? Don’t worry—you’re not alone, and the good news is, there’s a straightforward fix. In this guide, I’ll explain why this happens and show you how to fix it step by step. By the end of this article, you’ll have your Epic Games Launcher installed and ready to go.
Key Takeaways
- The error typically happens due to installation file corruption or system issues.
- The easiest fix is installing the Epic Games Launcher directly from the Microsoft Store.
- Running the installer as an Administrator or cleaning up temporary files can also help.
- Keeping your system updated prevents similar issues in the future.
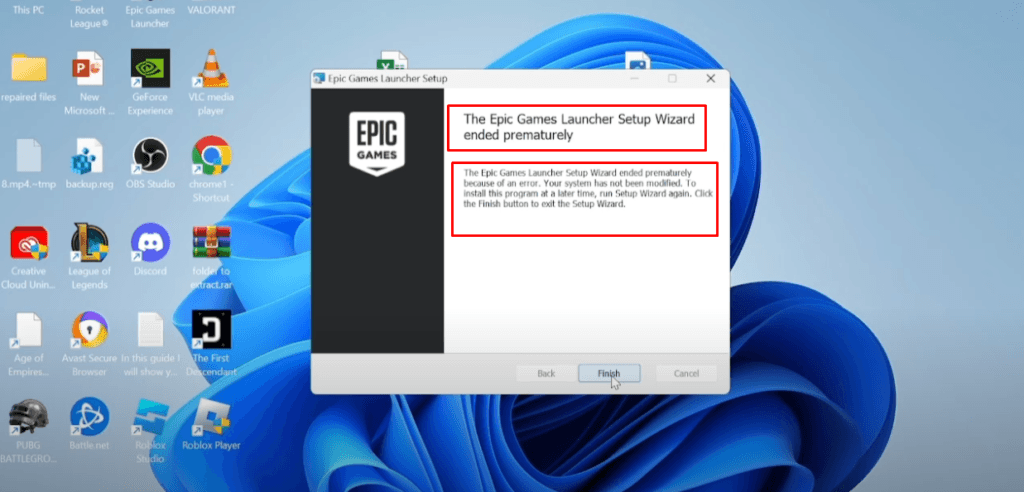
Why Does “Setup Wizard Ended Prematurely” Happen?
This error occurs when the installation process gets interrupted or cannot complete. Common causes include:
- Corrupted installation files: Downloading files from unofficial sources can lead to errors.
- Outdated Windows: Your system may not meet the launcher’s requirements.
- Software conflicts: Antivirus software or firewalls can interfere with the installation.
- Permissions issues: Installing without the right system permissions can block the process.
Understanding the cause helps you apply the right fix.
How to Fix the “Setup Wizard Ended Prematurely” Error
Here are several methods to solve this problem. Follow the steps in order for the best results.
Install Epic Games Launcher from the Microsoft Store
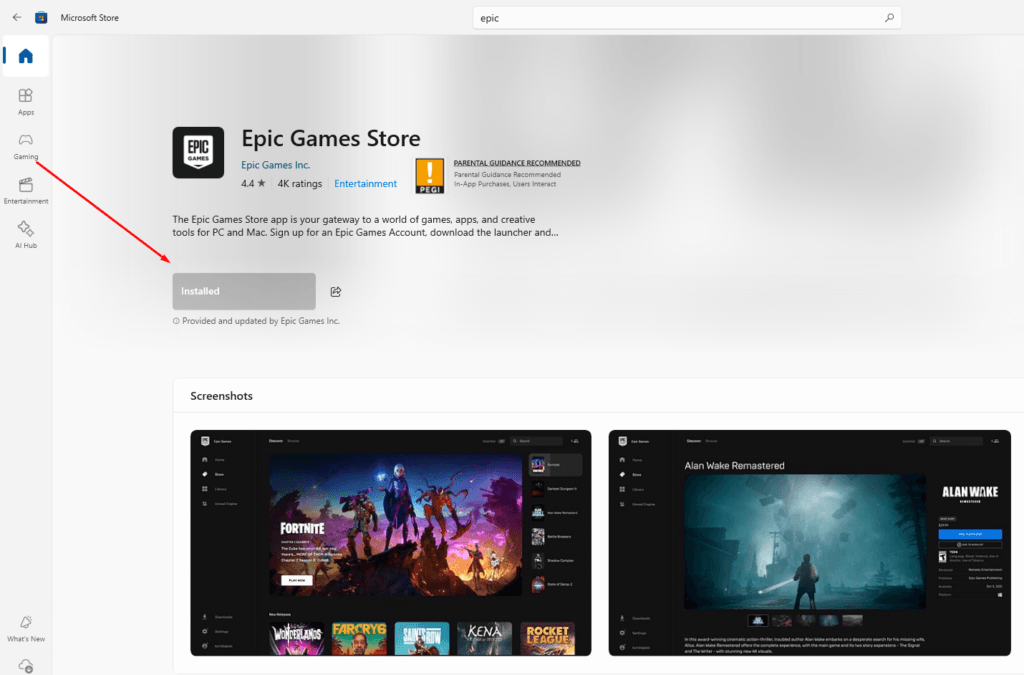
This is the most reliable method to fix the error. The Microsoft Store ensures that the files are clean and compatible with your system.
- Open Microsoft Store by pressing the Windows key, typing “Microsoft Store,” and hitting Enter.
- Search for Epic Games Launcher in the search bar.
- Click the “Get” or “Install” button and wait for the installation to complete.
- Once installed, open the launcher, sign in, and start gaming!
Perform a Clean Installation (Alternative Method)
If you prefer not to use the Microsoft Store, you can try this manual approach.
- Uninstall Previous Attempts:
- Go to Control Panel > Programs > Uninstall a Program.
- Find the Epic Games Launcher, right-click, and select Uninstall.
- Delete Leftover Files:
- Open File Explorer and navigate to
C:\Program Files (x86)\Epic Games. - Delete the folder if it exists.
- Open File Explorer and navigate to
- Clear Temporary Files:
- Press
Win + R, type%temp%, and delete all temporary files.
- Press
- Download the Installer Again:
- Visit the official Epic Games website and download the latest version of the launcher.
- Run as Administrator:
- Right-click the installer and select Run as Administrator to ensure proper permissions.
Check System Requirements and Updates
An outdated system can cause unexpected errors. Here’s how to ensure your system is ready:
- Update Windows:
- Go to Settings > Update & Security > Windows Update.
- Click Check for Updates and install any available updates.
- Check Compatibility:
- Ensure your PC meets the minimum requirements for the Epic Games Launcher.
Disable Antivirus or Firewall Temporarily
Sometimes, your antivirus or firewall blocks the installation process. Temporarily disable these protections while installing:
- Open your antivirus program or Windows Security.
- Turn off Real-Time Protection or temporarily disable the firewall.
- Re-enable these settings after the installation completes.
Why Installing via Microsoft Store Is the Best Option
The Microsoft Store simplifies everything. It:
- Ensures clean and verified files.
- Automatically manages system compatibility.
- Avoids software conflicts by streamlining the process.
If you’re tired of dealing with installation headaches, this method is the way to go.
Preventing Future Issues
Here are some tips to avoid similar problems in the future:
- Always download software from official sources like the Microsoft Store or Epic Games website.
- Keep your Windows system and drivers up to date.
- Regularly clear temporary files to avoid system clutter.
- Ensure you have sufficient storage space before installing large programs.
FAQs
Why does the Epic Games Launcher setup fail?
The setup often fails due to corrupted files, outdated system software, or permissions issues. Antivirus or firewalls may also block the installation.
Can I fix this error without using the Microsoft Store?
Yes, you can perform a clean installation by uninstalling previous attempts, clearing leftover files, and downloading the launcher directly from Epic Games’ official site.
Does reinstalling Windows solve this problem?
Reinstalling Windows should be a last resort. Try the methods above first; they’re simpler and usually effective.
Conclusion
The “Setup Wizard Ended Prematurely” error is frustrating, but it’s easy to fix when you know what to do. Installing the Epic Games Launcher from the Microsoft Store is the quickest and most reliable solution. If that doesn’t work, a clean installation or checking for system updates should do the trick.
Got your launcher working? Awesome! Share this guide with your friends who might face the same issue. Happy gaming!
Tutorials
How to Fix PS5 Black Screen Issue When Switching to 4K: Troubleshooting Guide
If you’re a PS5 user, you know how much better games look in 4K. But if your screen goes black every time you switch to 4K output, it’s a massive frustration. Many PS5 users experience a random black screen when setting their console to 4K resolution. Usually, this happens due to a few common issues with the HDMI cable, display device, or specific PS5 settings.
In this guide, I’ll take you through step-by-step solutions to get your PS5 back in working order at 4K resolution. Let’s dive in and find out what you need to do to fix this issue.
Key Takeaways
- Check HDMI Cable: Use a high-speed HDMI 2.1 cable for stable 4K output.
- Update Firmware: Ensure both PS5 and TV firmware are up-to-date.
- Adjust Video Output Settings: Lower resolution temporarily, then retry 4K.
- Modify HDR and HDCP Settings: Switching off HDCP or adjusting HDR may solve display issues.
1. What Causes the Black Screen on PS5 When Switching to 4K?
The PS5 black screen issue when switching to 4K can stem from a few typical problems:
- HDMI Cable or Port Issues: Not all HDMI cables or ports support 4K. For stable output, you’ll need a high-speed HDMI 2.1 cable and compatible ports on your TV.

- Compatibility with TV Settings: Sometimes, the display’s settings may need adjusting for 4K to work smoothly.
- Firmware or Software Glitches: Outdated firmware on either the PS5 or your display can cause display problems. Keep both updated to prevent compatibility issues.
2. Step-by-Step Troubleshooting Guide for the PS5 Black Screen Issue
To fix the black screen issue, let’s go through the most effective steps one by one.
Step 1: Restart the PS5 in Safe Mode and Lower the Resolution
- Power Off the PS5 – Hold down the power button until you hear a second beep (about 7 seconds).
- Boot into Safe Mode – Press and hold the power button again until the PS5 starts in Safe Mode.
- Select Change Video Output – In Safe Mode, go to “Change Video Output” and select “Change Resolution.”
- Lower the Resolution – Set the resolution to 1080p temporarily.
Switching to a lower resolution will help you access the system and adjust settings that could prevent the black screen. Once you’re back in the console, you can gradually increase the resolution to test if 4K can work without causing issues.
Step 2: Check and Upgrade Your HDMI Cable
For 4K output, the HDMI cable is a vital link. Not all HDMI cables support 4K, so check that you’re using an HDMI 2.1 cable specifically designed for high-speed, high-quality video. Here’s how to test it:
- Use a New HDMI 2.1 Cable – Make sure the HDMI cable is labeled as 2.1, which is the recommended standard for 4K gaming.
- Try Different HDMI Ports – Some TVs only support 4K on specific ports. Switch to another port and see if the black screen disappears.
If the problem goes away with a new HDMI cable or port, then it’s safe to say the issue is with your original cable or the port.
Step 3: Update Firmware on PS5 and TV
- Update PS5 System Software – Go to Settings > System > System Software > System Software Update and Settings. Follow the prompts to ensure your PS5 software is current.
- Update TV Firmware – Some smart TVs have firmware updates that improve compatibility with gaming consoles. Check your TV’s settings menu or refer to the manufacturer’s website for instructions.
Keeping your firmware up-to-date prevents known bugs from causing display issues and ensures better compatibility between devices.
Step 4: Adjust PS5 Video Output Settings
In your PS5 settings, you have several options under Video Output to help fix the black screen issue.
- Change the Resolution – Go to Settings > Screen and Video > Video Output > Resolution. Try switching between 1080p, 2160p (4K), and Automatic to see which one works best.
- Set 4K to 60Hz or 120Hz – Some displays struggle with higher frame rates at 4K, so try limiting the refresh rate to 60Hz or 120Hz.
- Disable VRR (Variable Refresh Rate) – VRR can sometimes cause screen issues on displays that don’t support it well. Go to Settings > Screen and Video > VRR and toggle it off.

Step 5: Turn Off HDCP and Adjust HDR Settings
High-bandwidth Digital Content Protection (HDCP) can sometimes interfere with display output on certain TVs. Turning it off may help.
- Turn Off HDCP – Go to Settings > System > HDMI > Enable HDCP and turn this setting off.
- Modify HDR Settings – You can either enable or disable HDR to see if it affects the screen. Find this option in Settings > Screen and Video > HDR and test with it on and off.
Both HDCP and HDR settings can impact the video output on your PS5, so experimenting with these settings can reveal if they’re causing the black screen.
3. When to Seek Additional Support
If you’ve tried all these steps and your PS5 still shows a black screen at 4K, there could be a deeper issue with either the console or the display. Here’s what you can do next:
- Contact Sony Support – Sony may be able to provide more specialized guidance or repairs if needed.
- Check Your Display Device – If possible, try connecting your PS5 to a different 4K display to see if the problem persists. This will help confirm if the issue is with your console or your display device.
Conclusion
Fixing the PS5 black screen when switching to 4K can be a little tricky, but following these troubleshooting steps will solve the issue in most cases. Start with the basics like changing the resolution in Safe Mode, then work through the HDMI and firmware checks before adjusting video settings.
Remember, 4K gaming requires the right setup—cables, compatible displays, and updated firmware—to run smoothly. Hopefully, this guide has helped you get your PS5 back in action at 4K, delivering the incredible visual experience it’s designed for.
FAQs
1. Why does my PS5 show a black screen when I switch to 4K?
The black screen can happen due to HDMI cable limitations, compatibility settings on your display, or firmware issues.
2. Can I use any HDMI cable for 4K on my PS5?
No, you need an HDMI 2.1 cable for stable 4K output. Using an older HDMI cable might not support the high bandwidth needed for 4K gaming.
3. Should I turn off HDR to fix the black screen issue on my PS5?
Disabling HDR can sometimes resolve the black screen issue, especially if your display struggles with HDR settings. Test this to see if it helps.
4. What is HDCP, and should I disable it on my PS5?
HDCP (High-bandwidth Digital Content Protection) is a feature to prevent unauthorized copying of digital content. Some displays don’t support it well, so disabling it can sometimes fix the black screen issue.
5. Can outdated firmware cause black screen issues?
Yes, outdated firmware on your PS5 or display can create compatibility issues with 4K. Always check for updates to ensure smooth performance.
Hopefully, this guide helps you troubleshoot your PS5 black screen issue with 4K output, getting you back to your gaming in stunning quality. Remember, if you keep experiencing issues, reaching out to Sony Support or your display’s manufacturer may be the best next step.

 Games Like2 years ago
Best Games Like Unblocked Games 77 | Top Alternatives

 Gaming1 year ago
Free Fire Best Sensitivity Settings For Headshot

 Top 102 years ago
The Top 20 Android Horror Games to Play with Friends

 Game Room Ideas12 months ago
52 Incredible Game Room Ideas to Elevate Your Home Entertainment

 Tutorials2 years ago
How to Fix the PS5 Green Screen – Tips To Try

 Tutorials12 months ago
How to Play Fishbowl Game: Rules, Regulations, and Tips

 Top 1012 months ago
10 Best Offline Mobile Games For Long Car Rides 2024

 Top 102 years ago
The 25 Best Offline iPhone Games to Play Without Internet


