Tutorials
All League of Legends Champions Released in 2010
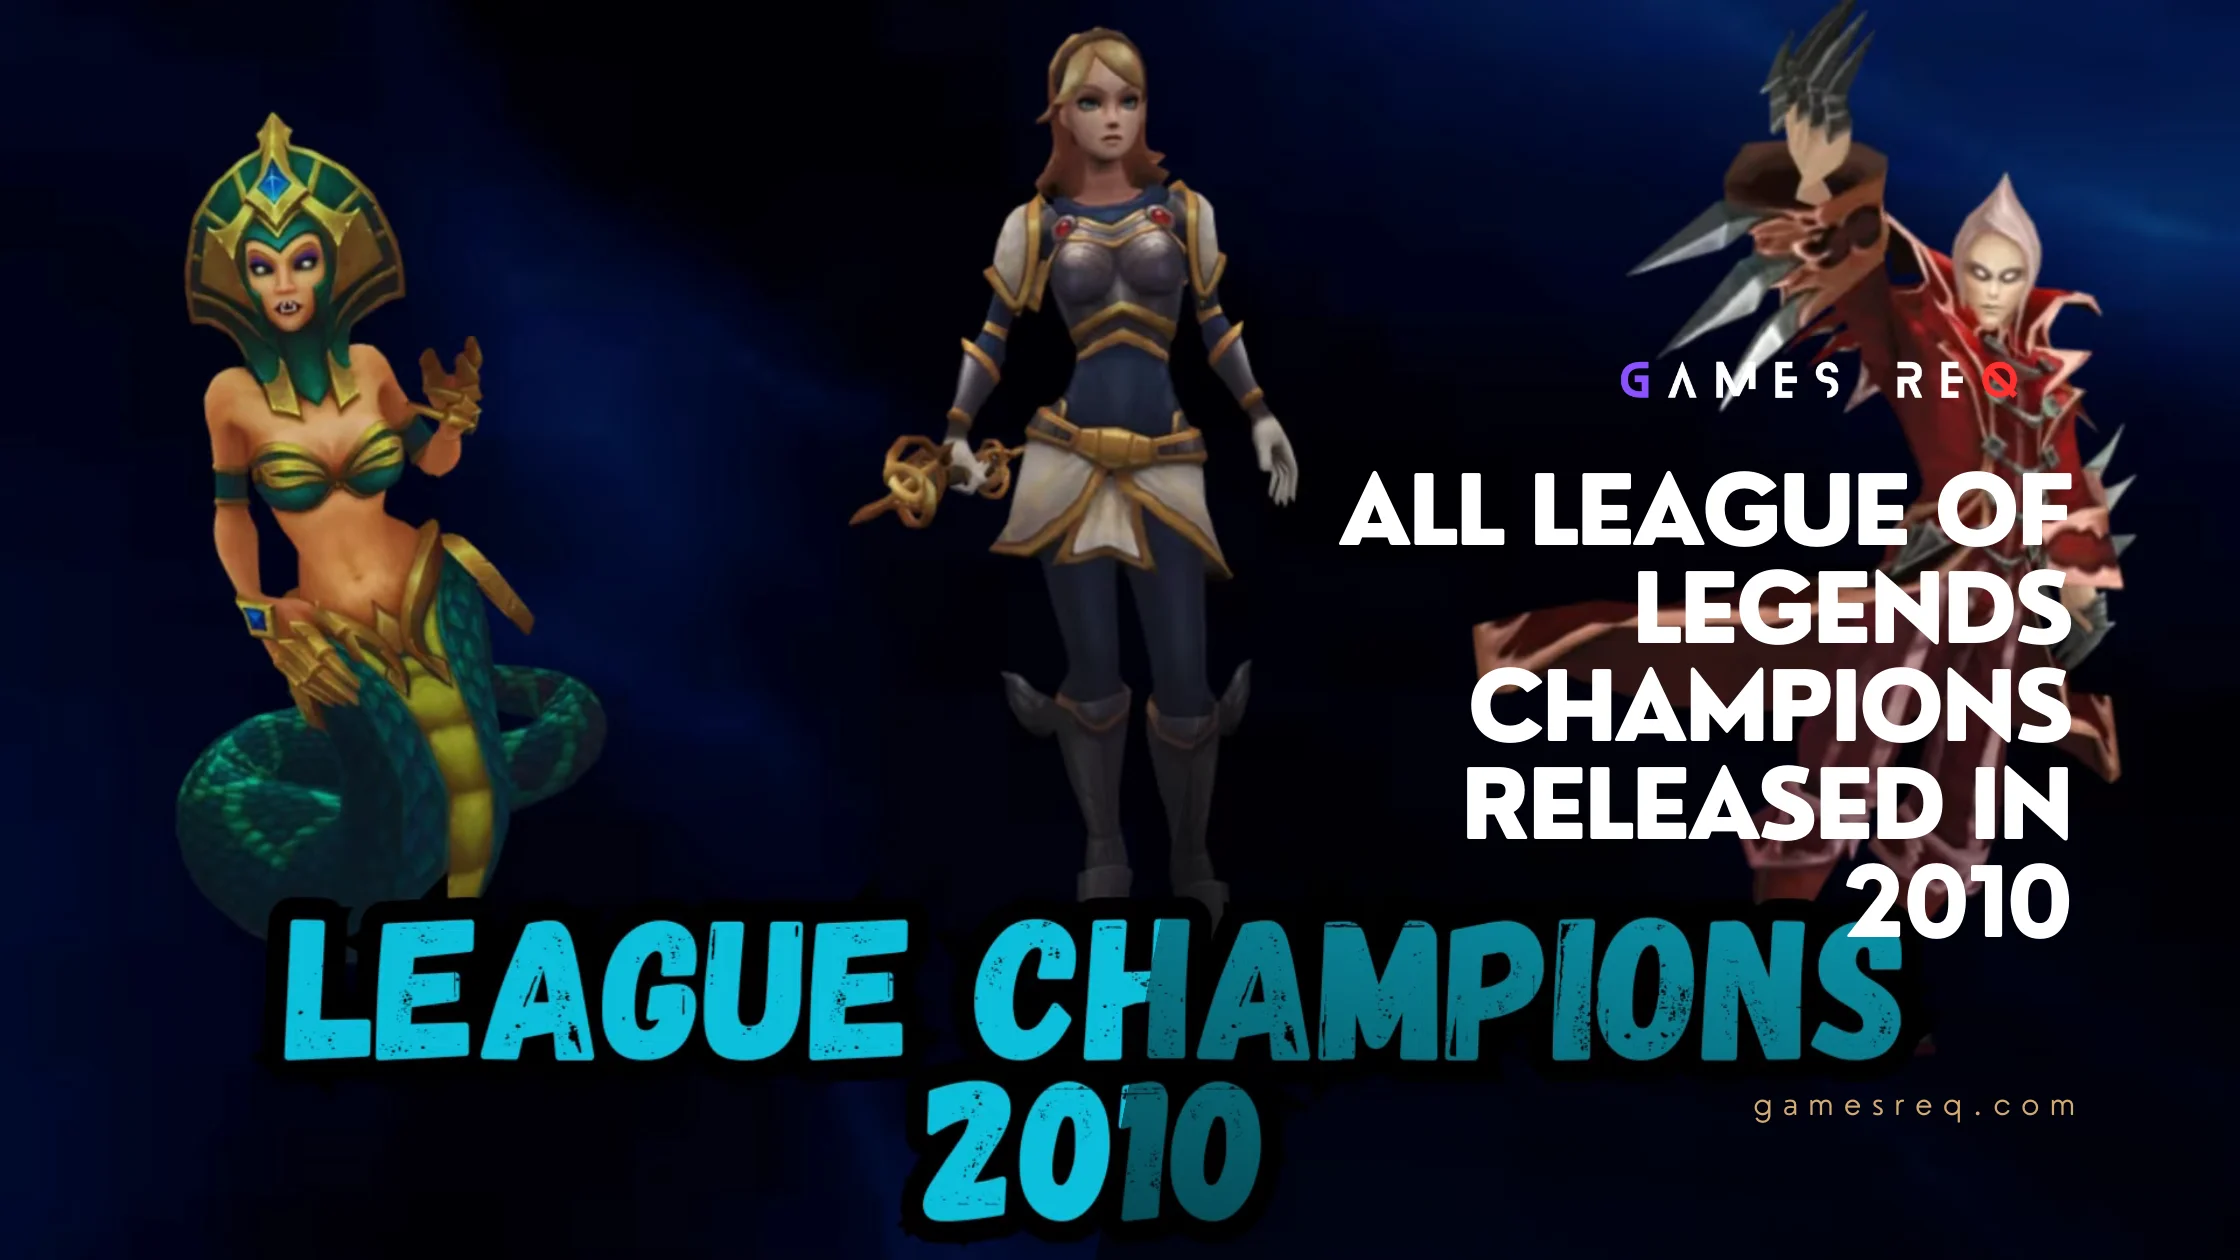
League of Legends first launched in 2009 and quickly grew in popularity over the following years. By 2010, Riot Games was releasing new champions at a rapid pace to expand the roster and give players more variety.
In total, 24 new League of Legends champions were added throughout 2010. This huge influx of new characters gave players a lot more options to choose from and helped keep the gameplay feeling fresh.
January 2010 – Poppy, Gragas, Pantheon
The first batch of new champions in 2010 arrived in January. First was Poppy, the yordle Demacian warrior who wields a massive hammer. With her tough exterior and ability to charge into battle, Poppy brought a new aggressive playstyle to top lane.
January also saw the introductions of Gragas and Pantheon. Gragas is a barrel-throwing brewmaster who provides both damage and disruption. Pantheon is an armor-clad Spartan warrior who excels at early game dominance with his long-range spear throws.
February 2010 – Mordekaiser, Ezreal, Shen, Kennen
February kept up the fast pace of new champions with four fresh faces. First was Mordekaiser, the terrifying undead warlord who damages enemies with his spiky mace and isolates targets in the Death Realm.
Skillshot lover Ezreal also arrived, offering marksmen players a more mobile and spell-slinging option in bot lane. His long range Mystic Shots and global ultimate brought new possibilities.
Support players got Shen, a ninja tank who protects allies with his Spirit Blade and Stand United ultimate to shield them. And for AP players, there was Kennen who stuns and damages groups of enemies by manifesting the storm.
March 2010 – Garen, Akali
March cooled off from February’s champion storm, but brought two strong additions. Garen spun into battle as a hardy juggernaut who fights for Demacia with his massive sword and Judgment ultimate.
Akali also appeared as a stealthy assassin from the Kinkou Order. She slices up targets with her kama and can hide in obscurity using Twilight Shroud before delivering the killer blow.
April 2010 – Malzahar
April saw just one new champion, but he made a big impact. Malzahar is the Prophet of the Void who summons voidlings and suppresses enemies with Nether Grasp, making him one of the strongest burst mages in League.
May 2010 – Olaf, Kog’Maw
The Freljord gained two new brawling champions in May. First was Olaf, an axe-wielding Berserker who rampages into fights at low health. With Ragnarok, he becomes immune to crowd control.
Kog’Maw also emerged as an adorable yet highly destructive creature from the Void. His versatility to build AD or AP makes him a threat, along with his long range artillery from Living Artillery.
June 2010 – Xin Zhao
June brought Xin Zhao into the fold, a determined Seneschal who knocks up and challenges enemies with Audacious Charge. With his relentless aggression, Xin Zhao was a formidable early game duelist and ganker.
July 2010 – Vladimir, Galio
Two quasi-vampiric champions came in July, both offering sustain in fights. Vladimir was a Hemomancer mage who damaged groups and healed himself with Crimson Rush and Transfusion.
Galio was a gargoyle bulwark who gained defenses from enemy AP. He could also shield allies and disrupt teamfights by diving in with Hero’s Entrance.
August 2010 – Urgot, Miss Fortune
August was an eventful month, starting with the introduction of Urgot. As a creepy chem-augmented executioner, Urgot could swap positions with enemies using Hyper-Kinetic Position Reverser.
Ranged carry players also got Miss Fortune, a bounty hunter with double pistols. She excelled at AoE damage with Bullet Time and could bounce Grenade shots to hit grouped up targets.
September 2010 – Sona, Swain
September brought two new champions with contrasting allegiances. Sona joined as an etwahl-playing songstress who empowered allies with auras and snared enemies with Crescendo.
Dark magic wielder Swain also appeared as the cunning leader of Noxus. He sustained damage in bird form and could pull several enemies together using Demonflare.
October 2010 – Lux, LeBlanc
October saw light magic and dark deception enter the Rift. Lux joined as an optimistic mage who snared targets with Light Binding and unleashed her full power in Final Spark.
But League also got its first deception champion with LeBlanc. She could create mirror images and mimic abilities, confusing enemies before executing them.
November 2010 – Irelia, Trundle
Ionia gained two new champions in November. Irelia came first, an agile blade dancer who dishsed out true damage with Ionian Fervor. Her Equilibrium Strike also let her stun and slow targets.
Trundle followed as a Troll King who leeched strengths from enemies with Subjugate and chilled them with Pillar of Ice. His troll healing kept him sustained in any brawl.
December 2010 – Cassiopeia, Katarina
December finished the year strong with two more champions. Cassiopeia brought a terrifying serpentine presence to mid lane. She dealt high sustained damage by repeatedly applying Twin Fang poison.
Katarina also burst onto the scene as an agile Noxian assassin. She could chain kills together with Voracity and Shunpo, wiping out teams when played well.
2010 Champion Highlights
2010 was one of the biggest years for new champions, more than doubling the original launch roster. Some highlights include:
- High mobility champions like Ezreal and Katarina
- Strong gankers like Xin Zhao, Shaco, and Maokai
- Sustain tanks like Vladimir and Mordekaiser
- Disruptive supports like Sona and Shen
- High burst mages like Veigar, Brand, and Malzahar
Many of these 2010 additions remain popular today after various reworks and visual upgrades. Overall, the 24 champions added great variety and laid the groundwork for League’s growing future roster.
Frequently Asked Questions
How many champions were in League of Legends at the start?
When League of Legends first launched in 2009, there were only 40 champions available. The starting roster provided a solid foundation, but was still small compared to the 160+ champions today.
Why did Riot release so many champions in 2010?
As a new game, Riot aimed to rapidly expand the League of Legends roster in the first few years. Releasing lots of champions kept the meta fluid and gave players more options to appeal to different playstyles.
Who were the first champions ever released?
The first batch of champions released with League’s launch in 2009 included popular basics like Ashe, Garen, Ryze, and Tryndamere. More niche picks like Twitch, Fiddlesticks, and Master Yi also appeared.
How many champions were added after 2010?
Champion releases slowed after 2010, but continued at a steady pace. Another 113 champions have been added since 2011 up through the latest releases, expanding the total roster size to over 160.
Which 2010 champions were the most impactful?
Champions like Lee Sin, Vayne, and Orianna have remained incredibly relevant even today after multiple seasons of meta shifts. Other noteworthy 2010 additions include Sona, Ezreal, Maokai, and Shaco.
Conclusion
The 24 champions added in 2010 represent League of Legends still finding its identity and carving out a spot in the growing MOBA genre. While not every addition succeeded, 2010 saw Riot taking risks on creative champion designs and laying the groundwork for future releases.
A few champions received updates due to power creep or outdated kits. But most 2010 releases still embody the core appeal and playstyle that attracted their original fans. With spicy picks like Gragas and Mordekaiser alongside mainstay ADCs like Ashe and Ezreal, 2010 was a foundational year for building League’s diverse champion roster.
Tutorials
How to Fix 0xc0000142 Error on Windows 10: Easy Step-by-Step Guide
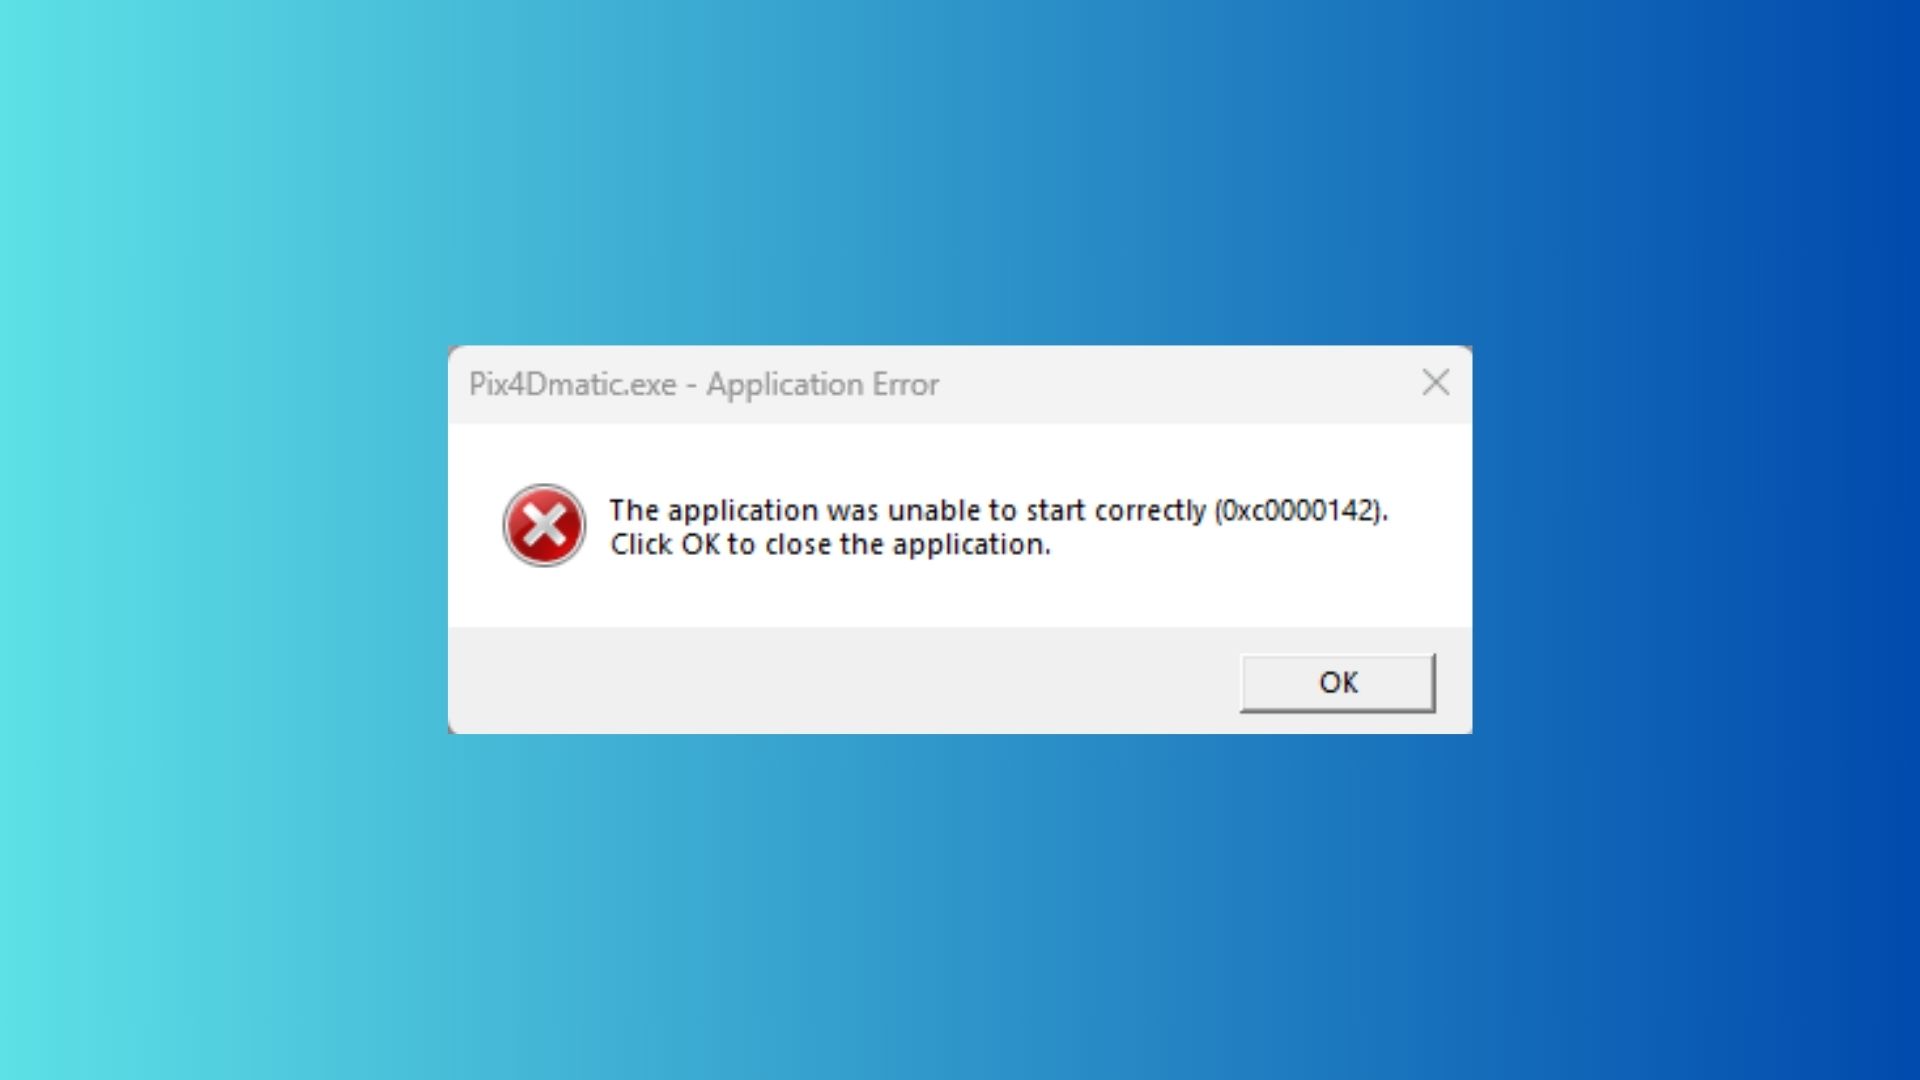
Ever fired up your favorite game, only to get slapped with the frustrating 0xc0000142 error on Windows 10? It’s like your PC is throwing a tantrum, refusing to launch your app or game. Don’t worry—you’re not alone, and there’s a fix that works like a charm. I’ve been there, and after a clean Windows 10 install and some key software setups, I got rid of this error for good. Stick with me, and I’ll walk you through every step to banish this error and get back to gaming or working smoothly. Ready to dive in? Let’s fix that 0xc0000142 error together!
Key Takeaways
- The 0xc0000142 error stops apps or games from launching due to corrupted files, missing DLLs, or outdated drivers.
- A clean Windows 10 installation using a USB created with Rufus can fix the issue.
- Installing Visual C++, DirectX, and .NET Framework 4.8 after the clean install is crucial.
- Adding a free antivirus like Bitdefender helps keep your system secure.
- Regular updates and safe software practices prevent the error from coming back.
Short Answer to Fix 0xc0000142 Error
The 0xc0000142 error usually pops up when your system is missing key files or has corrupted ones, especially for games. The best fix? Do a clean Windows 10 install using a USB made with Rufus and the official Windows 10 ISO. After that, install Visual C++, DirectX, .NET Framework 4.8, and a free antivirus like Bitdefender. This combo wipes out the error and keeps your PC running smoothly.
What Causes the 0xc0000142 Error?
So, what’s behind this annoying error? The 0xc0000142 error happens when an application—often a game like GTA V or Call of Duty—can’t start because something’s gone wrong with your system. Think of it like trying to start a car with a missing spark plug. The main culprits are:
- Corrupted system files: Windows files get damaged, maybe from a bad shutdown or malware.
- Missing DLLs: These are tiny files apps need to run, and if they’re gone, you’re stuck.
- Outdated drivers: Old graphics or system drivers can mess things up.
- Incompatible software: Some programs just don’t play nice with Windows 10.
This error loves to crash the party when you’re trying to game, but don’t sweat it. A clean install and some software updates will get you back on track. Curious about how to do it? Let’s break it down.
How to Perform a Clean Windows 10 Installation
A clean install is like giving your PC a fresh start. It wipes out all the junk and errors, including that pesky 0xc0000142. Here’s how to do it, step by step. Don’t skip any part, and you’ll be golden.
Step 1: Download the Latest Windows 10 ISO
First, you need the official Windows 10 ISO file, which is like the blueprint for your new system. Head to Microsoft’s official website and grab the Media Creation Tool. This tool is super easy to use, even if you’re not a tech wizard.
- Open the Media Creation Tool and select “Create installation media for another PC.”
- Choose your language, Windows 10 edition (usually Home or Pro), and 64-bit architecture.
- Pick “ISO file” and save it to your computer. This file is big, so make sure you’ve got a few gigs of free space.
This ISO is your ticket to a fresh Windows install. Got it downloaded? Awesome, let’s move on.
Step 2: Create a Bootable USB with Rufus
Now, you’ll turn that ISO into a bootable USB drive using Rufus, a free tool that’s dead simple to use. You’ll need a USB drive with at least 8GB of space—make sure it’s empty because this process wipes it clean.
- Plug in your USB drive and open Rufus.
- Select your USB drive from the list at the top.
- Click “Select” and find the Windows 10 ISO you downloaded.
- Keep the default settings (like NTFS file system) and hit “Start.” This takes a few minutes, so grab a snack.
- When it’s done, you’ll have a USB ready to install Windows 10.
Your USB is now a magic wand for fixing your PC. Ready to use it? Let’s keep going.
Step 3: Format Hard Drive and Install Windows 10
Here’s where things get real—you’re going to wipe your hard drive and install a fresh Windows 10. But first, back up your files! Photos, videos, game saves—copy them to an external drive or cloud storage like Google Drive. Once you’re backed up, follow these steps:
- Plug your USB into your PC and restart it.
- Enter your PC’s BIOS by pressing a key like F2, F12, or Delete during boot (check your PC’s manual for the exact key).
- Set the USB as the first boot device in the BIOS.
- Save and exit. Your PC will boot from the USB.
- Follow the Windows 10 setup prompts: choose your language, click “Install Now,” and enter your product key (or skip it if you don’t have one).
- Select “Custom: Install Windows only” to do a clean install.
- Delete all partitions on your main drive (where Windows is installed) and select the unallocated space to install Windows. This formats the drive, wiping everything.
- Let Windows install. Your PC will restart a few times—don’t panic, it’s normal.
Once it’s done, you’ll have a brand-new Windows 10 setup. No more 0xc0000142 error… yet. We’ve got a few more steps to lock it in.
Step 4: Post-Installation Setup
Your fresh Windows is like a blank canvas—it needs some key software to run games and apps without errors. Here’s what to install, and why it matters.
Install Visual C++ Redistributables
Visual C++ is like the glue that holds many games and apps together. Without it, you’ll get errors like 0xc0000142. Go to Microsoft’s Visual C++ download page and grab the latest versions (usually 2015-2022, both x86 and x64).
- Download and run the installer.
- Follow the prompts to install. It’s quick and painless.
- Restart your PC if prompted.
This step fixes missing DLL issues that cause the 0xc0000142 error. Done? Let’s move to the next piece.
Install DirectX
DirectX is a must for gaming—it helps your graphics card talk to games. Without it, games might not launch, or you’ll see that dreaded error. You can get it from Microsoft’s DirectX page or TechPowerUp.
- Download the DirectX End-User Runtime Web Installer.
- Run it and let it install the latest DirectX components.
- Restart your PC to make sure everything’s set.
This ensures your games run smoothly. One more key install to go.
Install .NET Framework 4.8
.NET Framework is another behind-the-scenes helper that apps and games need. Head to Microsoft’s .NET Framework 4.8 download page and grab it.
- Download the installer and run it.
- Follow the prompts to install. It’s straightforward.
- Restart your PC if needed.
This fixes compatibility issues that can trigger the 0xc0000142 error. Almost there!
Install Bitdefender Free Trial (Optional)
To keep your PC safe from malware that can cause errors, install a good antivirus. I used Bitdefender’s free 30-day trial, and it’s awesome for catching threats without slowing your system. Go to Bitdefender’s website to download it.
- Download the free trial installer.
- Run it and follow the setup wizard.
- Let Bitdefender scan your system to catch any lurking issues.
This step isn’t mandatory, but it’s a smart move to keep your PC clean. Want to know if it worked? Let’s test it.
Step 5: Test Games and Applications
Now it’s time to see if the error’s gone. Fire up the game or app that was giving you the 0xc0000142 error. For me, after installing Visual C++, DirectX, and .NET Framework, every game launched perfectly. If it works, you’re done! If not, double-check that you installed all the software correctly or try updating your graphics drivers from your GPU maker’s website (like NVIDIA or AMD).
How to Avoid 0xc0000142 Errors in the Future
You’ve fixed the error, but how do you keep it from coming back? Here are some easy tips to keep your PC running like a dream:
- Update Windows regularly: Go to Settings > Update & Security and check for updates. New patches fix bugs that cause errors.
- Stick to trusted software: Don’t download sketchy apps from random websites—they can mess up your system.
- Keep drivers fresh: Update your graphics and other drivers from the manufacturer’s site.
- Run system checks: Use commands like
sfc /scannowin Command Prompt to fix corrupted files. You can also useDISM /Online /Cleanup-Image /RestoreHealthfor deeper repairs. - Use an antivirus: Stick with Bitdefender or another trusted antivirus to block malware that corrupts DLLs.
Follow these, and you’ll keep that 0xc0000142 error in the rearview mirror. But what if you have more questions? I’ve got you covered.
Frequently Asked Questions
What is the 0xc0000142 error in Windows 10?
It’s an error that stops apps or games from launching, usually because of missing or corrupted files like DLLs, outdated drivers, or broken system files.
Can I fix 0xc0000142 without reinstalling Windows?
Sometimes, yes—try updating Visual C++, DirectX, or drivers. But a clean install, like described here, is the most reliable fix for stubborn cases.
Is it safe to format my hard drive?
Yes, as long as you back up your files first. Formatting wipes everything, so save photos, videos, and game saves to an external drive or cloud.
Why do I need Visual C++ and DirectX for games?
These are like toolkits games use to run properly. Without them, you’ll get errors like 0xc0000142 because the game can’t find the files it needs.
How does Bitdefender help prevent errors like 0xc0000142?
Bitdefender stops malware that can corrupt system files or DLLs, which are common causes of the 0xc0000142 error.
Final Thoughts on Fixing 0xc0000142 Error
Dealing with the 0xc0000142 error is a pain, but a clean Windows 10 install, paired with the right software like Visual C++, DirectX, and .NET Framework, can make it disappear. I’ve walked you through every step, from downloading the Windows ISO to testing your games. Just make sure to back up your files before formatting, and you’ll be back to gaming or working in no time. Did this fix work for you? Drop a comment below or hit me up for more tech tips. Let’s keep those errors away for good!
Tutorials
Fix Epic Games Launcher Setup Ended Prematurely 2025
![[SLOVED] How To FIX Epic Games Launcher Setup Wizard Ended Prematurely](https://gamesreq.com/wp-content/uploads/2024/12/SLOVED-How-To-FIX-Epic-Games-Launcher-Setup-Wizard-Ended-Prematurely.webp)
How to Fix Epic Games Launcher Setup Wizard Ended Prematurely
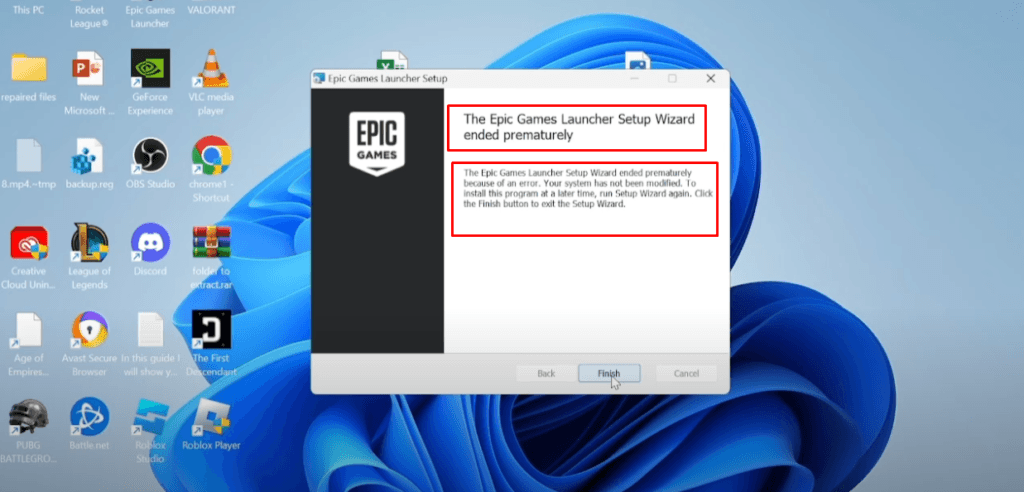
Are you stuck with the annoying “Setup Wizard Ended Prematurely” error while installing the Epic Games Launcher? Don’t worry—you’re not alone, and the good news is, there’s a straightforward fix. In this guide, I’ll explain why this happens and show you how to fix it step by step. By the end of this article, you’ll have your Epic Games Launcher installed and ready to go.
Key Takeaways
- The error typically happens due to installation file corruption or system issues.
- The easiest fix is installing the Epic Games Launcher directly from the Microsoft Store.
- Running the installer as an Administrator or cleaning up temporary files can also help.
- Keeping your system updated prevents similar issues in the future.
Why Does “Setup Wizard Ended Prematurely” Happen?
This error occurs when the installation process gets interrupted or cannot complete. Common causes include:
- Corrupted installation files: Downloading files from unofficial sources can lead to errors.
- Outdated Windows: Your system may not meet the launcher’s requirements.
- Software conflicts: Antivirus software or firewalls can interfere with the installation.
- Permissions issues: Installing without the right system permissions can block the process.
Understanding the cause helps you apply the right fix.
How to Fix the “Setup Wizard Ended Prematurely” Error
Here are several methods to solve this problem. Follow the steps in order for the best results.
Install Epic Games Launcher from the Microsoft Store
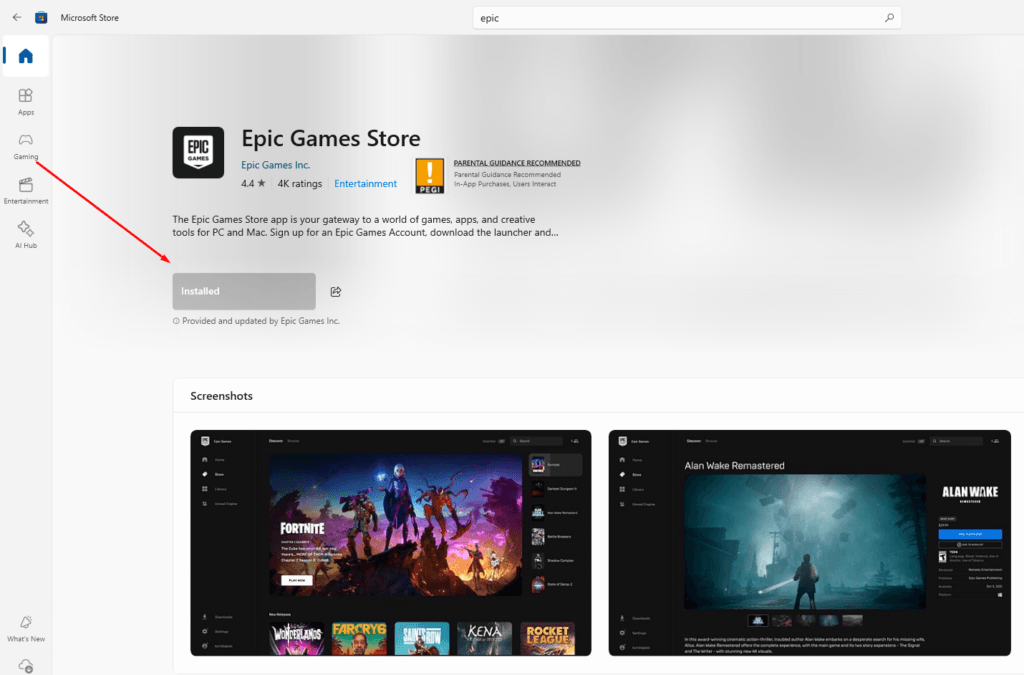
This is the most reliable method to fix the error. The Microsoft Store ensures that the files are clean and compatible with your system.
- Open Microsoft Store by pressing the Windows key, typing “Microsoft Store,” and hitting Enter.
- Search for Epic Games Launcher in the search bar.
- Click the “Get” or “Install” button and wait for the installation to complete.
- Once installed, open the launcher, sign in, and start gaming!
Perform a Clean Installation (Alternative Method)
If you prefer not to use the Microsoft Store, you can try this manual approach.
- Uninstall Previous Attempts:
- Go to Control Panel > Programs > Uninstall a Program.
- Find the Epic Games Launcher, right-click, and select Uninstall.
- Delete Leftover Files:
- Open File Explorer and navigate to
C:\Program Files (x86)\Epic Games. - Delete the folder if it exists.
- Open File Explorer and navigate to
- Clear Temporary Files:
- Press
Win + R, type%temp%, and delete all temporary files.
- Press
- Download the Installer Again:
- Visit the official Epic Games website and download the latest version of the launcher.
- Run as Administrator:
- Right-click the installer and select Run as Administrator to ensure proper permissions.
Check System Requirements and Updates
An outdated system can cause unexpected errors. Here’s how to ensure your system is ready:
- Update Windows:
- Go to Settings > Update & Security > Windows Update.
- Click Check for Updates and install any available updates.
- Check Compatibility:
- Ensure your PC meets the minimum requirements for the Epic Games Launcher.
Disable Antivirus or Firewall Temporarily
Sometimes, your antivirus or firewall blocks the installation process. Temporarily disable these protections while installing:
- Open your antivirus program or Windows Security.
- Turn off Real-Time Protection or temporarily disable the firewall.
- Re-enable these settings after the installation completes.
Why Installing via Microsoft Store Is the Best Option
The Microsoft Store simplifies everything. It:
- Ensures clean and verified files.
- Automatically manages system compatibility.
- Avoids software conflicts by streamlining the process.
If you’re tired of dealing with installation headaches, this method is the way to go.
Preventing Future Issues
Here are some tips to avoid similar problems in the future:
- Always download software from official sources like the Microsoft Store or Epic Games website.
- Keep your Windows system and drivers up to date.
- Regularly clear temporary files to avoid system clutter.
- Ensure you have sufficient storage space before installing large programs.
FAQs
Why does the Epic Games Launcher setup fail?
The setup often fails due to corrupted files, outdated system software, or permissions issues. Antivirus or firewalls may also block the installation.
Can I fix this error without using the Microsoft Store?
Yes, you can perform a clean installation by uninstalling previous attempts, clearing leftover files, and downloading the launcher directly from Epic Games’ official site.
Does reinstalling Windows solve this problem?
Reinstalling Windows should be a last resort. Try the methods above first; they’re simpler and usually effective.
Conclusion
The “Setup Wizard Ended Prematurely” error is frustrating, but it’s easy to fix when you know what to do. Installing the Epic Games Launcher from the Microsoft Store is the quickest and most reliable solution. If that doesn’t work, a clean installation or checking for system updates should do the trick.
Got your launcher working? Awesome! Share this guide with your friends who might face the same issue. Happy gaming!
Tutorials
How to Fix PS5 Black Screen Issue When Switching to 4K: Troubleshooting Guide
If you’re a PS5 user, you know how much better games look in 4K. But if your screen goes black every time you switch to 4K output, it’s a massive frustration. Many PS5 users experience a random black screen when setting their console to 4K resolution. Usually, this happens due to a few common issues with the HDMI cable, display device, or specific PS5 settings.
In this guide, I’ll take you through step-by-step solutions to get your PS5 back in working order at 4K resolution. Let’s dive in and find out what you need to do to fix this issue.
Key Takeaways
- Check HDMI Cable: Use a high-speed HDMI 2.1 cable for stable 4K output.
- Update Firmware: Ensure both PS5 and TV firmware are up-to-date.
- Adjust Video Output Settings: Lower resolution temporarily, then retry 4K.
- Modify HDR and HDCP Settings: Switching off HDCP or adjusting HDR may solve display issues.
1. What Causes the Black Screen on PS5 When Switching to 4K?
The PS5 black screen issue when switching to 4K can stem from a few typical problems:
- HDMI Cable or Port Issues: Not all HDMI cables or ports support 4K. For stable output, you’ll need a high-speed HDMI 2.1 cable and compatible ports on your TV.

- Compatibility with TV Settings: Sometimes, the display’s settings may need adjusting for 4K to work smoothly.
- Firmware or Software Glitches: Outdated firmware on either the PS5 or your display can cause display problems. Keep both updated to prevent compatibility issues.
2. Step-by-Step Troubleshooting Guide for the PS5 Black Screen Issue
To fix the black screen issue, let’s go through the most effective steps one by one.
Step 1: Restart the PS5 in Safe Mode and Lower the Resolution
- Power Off the PS5 – Hold down the power button until you hear a second beep (about 7 seconds).
- Boot into Safe Mode – Press and hold the power button again until the PS5 starts in Safe Mode.
- Select Change Video Output – In Safe Mode, go to “Change Video Output” and select “Change Resolution.”
- Lower the Resolution – Set the resolution to 1080p temporarily.
Switching to a lower resolution will help you access the system and adjust settings that could prevent the black screen. Once you’re back in the console, you can gradually increase the resolution to test if 4K can work without causing issues.
Step 2: Check and Upgrade Your HDMI Cable
For 4K output, the HDMI cable is a vital link. Not all HDMI cables support 4K, so check that you’re using an HDMI 2.1 cable specifically designed for high-speed, high-quality video. Here’s how to test it:
- Use a New HDMI 2.1 Cable – Make sure the HDMI cable is labeled as 2.1, which is the recommended standard for 4K gaming.
- Try Different HDMI Ports – Some TVs only support 4K on specific ports. Switch to another port and see if the black screen disappears.
If the problem goes away with a new HDMI cable or port, then it’s safe to say the issue is with your original cable or the port.
Step 3: Update Firmware on PS5 and TV
- Update PS5 System Software – Go to Settings > System > System Software > System Software Update and Settings. Follow the prompts to ensure your PS5 software is current.
- Update TV Firmware – Some smart TVs have firmware updates that improve compatibility with gaming consoles. Check your TV’s settings menu or refer to the manufacturer’s website for instructions.
Keeping your firmware up-to-date prevents known bugs from causing display issues and ensures better compatibility between devices.
Step 4: Adjust PS5 Video Output Settings
In your PS5 settings, you have several options under Video Output to help fix the black screen issue.
- Change the Resolution – Go to Settings > Screen and Video > Video Output > Resolution. Try switching between 1080p, 2160p (4K), and Automatic to see which one works best.
- Set 4K to 60Hz or 120Hz – Some displays struggle with higher frame rates at 4K, so try limiting the refresh rate to 60Hz or 120Hz.
- Disable VRR (Variable Refresh Rate) – VRR can sometimes cause screen issues on displays that don’t support it well. Go to Settings > Screen and Video > VRR and toggle it off.
Step 5: Turn Off HDCP and Adjust HDR Settings
High-bandwidth Digital Content Protection (HDCP) can sometimes interfere with display output on certain TVs. Turning it off may help.
- Turn Off HDCP – Go to Settings > System > HDMI > Enable HDCP and turn this setting off.
- Modify HDR Settings – You can either enable or disable HDR to see if it affects the screen. Find this option in Settings > Screen and Video > HDR and test with it on and off.
Both HDCP and HDR settings can impact the video output on your PS5, so experimenting with these settings can reveal if they’re causing the black screen.
3. When to Seek Additional Support
If you’ve tried all these steps and your PS5 still shows a black screen at 4K, there could be a deeper issue with either the console or the display. Here’s what you can do next:
- Contact Sony Support – Sony may be able to provide more specialized guidance or repairs if needed.
- Check Your Display Device – If possible, try connecting your PS5 to a different 4K display to see if the problem persists. This will help confirm if the issue is with your console or your display device.
Conclusion
Fixing the PS5 black screen when switching to 4K can be a little tricky, but following these troubleshooting steps will solve the issue in most cases. Start with the basics like changing the resolution in Safe Mode, then work through the HDMI and firmware checks before adjusting video settings.
Remember, 4K gaming requires the right setup—cables, compatible displays, and updated firmware—to run smoothly. Hopefully, this guide has helped you get your PS5 back in action at 4K, delivering the incredible visual experience it’s designed for.
FAQs
1. Why does my PS5 show a black screen when I switch to 4K?
The black screen can happen due to HDMI cable limitations, compatibility settings on your display, or firmware issues.
2. Can I use any HDMI cable for 4K on my PS5?
No, you need an HDMI 2.1 cable for stable 4K output. Using an older HDMI cable might not support the high bandwidth needed for 4K gaming.
3. Should I turn off HDR to fix the black screen issue on my PS5?
Disabling HDR can sometimes resolve the black screen issue, especially if your display struggles with HDR settings. Test this to see if it helps.
4. What is HDCP, and should I disable it on my PS5?
HDCP (High-bandwidth Digital Content Protection) is a feature to prevent unauthorized copying of digital content. Some displays don’t support it well, so disabling it can sometimes fix the black screen issue.
5. Can outdated firmware cause black screen issues?
Yes, outdated firmware on your PS5 or display can create compatibility issues with 4K. Always check for updates to ensure smooth performance.
Hopefully, this guide helps you troubleshoot your PS5 black screen issue with 4K output, getting you back to your gaming in stunning quality. Remember, if you keep experiencing issues, reaching out to Sony Support or your display’s manufacturer may be the best next step.

 Games Like2 years ago
Best Games Like Unblocked Games 77 | Top Alternatives

 Gaming1 year ago
Free Fire Best Sensitivity Settings For Headshot

 Top 102 years ago
The Top 20 Android Horror Games to Play with Friends

 Game Room Ideas12 months ago
52 Incredible Game Room Ideas to Elevate Your Home Entertainment

 Tutorials2 years ago
How to Fix the PS5 Green Screen – Tips To Try

 Tutorials12 months ago
How to Play Fishbowl Game: Rules, Regulations, and Tips

 Top 1012 months ago
10 Best Offline Mobile Games For Long Car Rides 2024

 Top 102 years ago
The 25 Best Offline iPhone Games to Play Without Internet


