Gaming
Can You Play Call of Duty Mobile with PS4 Players?
Call of Duty Mobile (CODM) has become one of the most popular mobile games since its launch in 2019, amassing over 700 million downloads. Its fast-paced, action-packed gameplay has attracted legions of devoted fans. However, many console players who enjoy the Call of Duty franchise on platforms like the PS4 are curious if CODM offers cross-platform functionality to play with friends on different devices.
In this article, we’ll explore whether PS4 players can play Call of Duty Mobile and dive into topics like crossplay capabilities, controller compatibility, and more.
Key Takeaways
- Call of Duty Mobile does not support crossplay with PS4
- You can use a PS4 controller to play CODM on mobile devices
- Players using controllers are matchmade together in CODM
- You can play CODM on PC with an emulator like GameLoop and match with other emulator players
Does Call of Duty Mobile Work With PS4?
Unfortunately, Call of Duty Mobile does not allow crossplay between mobile devices and PlayStation 4 consoles. CODM runs on a different game engine than Call of Duty console titles and has different developers, so full integration between the platforms is not currently possible.
Activision has not announced plans to implement crossplay between CODM and consoles like PS4 in the future. The mobile version is likely to remain a standalone title with its own niche and community for the foreseeable future.
Can You Play Call of Duty Mobile with a PS4 Controller?
The good news is that PS4 controllers can be used to play CODM on mobile devices. This allows you to enjoy the precise aim and responsive controls that console gamers are accustomed to when playing on phones and tablets.
Here are the basic steps to connect your DualShock 4 to CODM:
- Turn on Bluetooth connectivity on your mobile device
- Hold the PS and Share buttons on your PS4 controller simultaneously to put it in pairing mode
- Select the “Wireless Controller” device in your phone’s Bluetooth settings
- Launch CODM, go to settings and enable controller support
Once connected, you can customize your controller layout, sensitivity, aim assist and more in the Controller tab of the CODM settings menu. Note that playing with controllers puts you into matchmaking pools with other controller users for a fair gaming experience.
Can I Play COD Mobile on My PC?
Playing mobile games on a big screen with mouse/keyboard controls appeals to many players. Officially, the only way to play CODM on PC is by using the Tencent Gaming Buddy emulator, now called GameLoop.
Here’s a quick guide to getting set up:
- Download and install GameLoop on your Windows PC
- Open GameLoop and search for Call of Duty Mobile in the game center
- Install CODM through GameLoop and launch it after completion
- CODM should now open on your PC at mouse and keyboard controls
Similar to controllers, players using GameLoop are matchmade together separately from mobile users playing with touch controls.
Frequently Asked Questions
Why can’t I play CODM with my friend on PS4?
Call of Duty Mobile was designed from the ground up for mobile platforms, so integrating crossplay with powerful console systems like the PS4 would upset game balance. Unless Activision decides to add this functionality in the future, CODM will remain mobile-only.
What other controllers work with CODM besides PS4?
You can use Xbox One, Xbox Series X|S and PS5 controllers to play Call of Duty Mobile. Support extends to most major Bluetooth gamepads from recognizable brands.
Is playing CODM on PC with GameLoop allowed or considered cheating?
Using the official GameLoop emulator to play CODM on PC is permitted by Activision. Players get matchmade separately from mobile users to keep gameplay fair across both platforms.
Can I sync my CODM progress across mobile and GameLoop?
Unfortunately your in-game progression like battle pass tier, rank, weapon levels and more remain separate between the GameLoop emulator and mobile versions. No way currently exists to transfer data between platforms.
The Bottom Line
While you can enjoy Call of Duty Mobile using PS4 controllers and GameLoop emulator on PC, true crossplay with PlayStation 4 consoles is not possible. CODM remains a mobile-first title catered to phones and tablets specifically.
Hopefully this provided clarity on what options are available to play between platforms. Focus on linking up with fellow CODM players on mobile or GameLoop for now and stay tuned for any potential crossplay integration announcements down the line!
Introduction to Cloud Gaming
Cloud gaming is a revolutionary paradigm shift in the gaming industry that allows players to stream video games directly over the Internet, bypassing the need for high-end hardware typically associated with traditional gaming setups. Unlike conventional gaming, where performance is heavily reliant on local hardware capabilities like graphics cards and processors, cloud gaming operates by offloading processing tasks to remote servers. This model presents a myriad of advantages, particularly for users operating with budget PCs.
One of the primary benefits of cloud gaming is the significant reduction in hardware requirements. Gamers no longer need to invest heavily in expensive components, as the performance is managed by powerful servers situated in data centers. For those who are conscious of their budgets, this means that they can enjoy high-quality gaming experiences without the financial burden associated with upgrading their personal computers. The accessibility of cloud gaming ensures that a diverse audience can partake in the gaming experience, which has become increasingly important in today’s market.
The evolution of cloud gaming services has been remarkable in recent years, with many tech companies investing heavily in this technology. Major players such as Google, Microsoft, and NVIDIA have introduced their platforms, making cloud gaming more mainstream. These services offer flexible subscription models and enable users to access an extensive library of games through a simple internet connection. Furthermore, advancements in internet speed and latency have made it possible for budget PC users to enjoy seamless gaming experiences comparable to traditional setups. As the cloud gaming trend continues to gain traction, it is essential to understand how to set up cloud gaming on a budget PC, ensuring that even those with limited resources can partake in this exciting evolution of gaming.
Requirements for Cloud Gaming on a Budget
Setting up cloud gaming on a budget PC involves understanding key requirements that enable a seamless gaming experience without the need for high-end hardware. The primary component of cloud gaming is a stable internet connection. A strong, reliable network is essential as the gaming process relies heavily on real-time data transfer. For optimal performance, a minimum download speed of 15 Mbps is recommended, while a wired connection can provide stronger stability compared to wireless setups.
In addition to a solid internet connection, it is crucial to have compatible devices. Most cloud gaming services are accessible across various platforms including PCs, laptops, tablets, and smartphones. However, ensuring that your budget PC meets certain minimum specifications will enhance the overall experience. While specific requirements can vary by gaming service, generally a dual-core processor, 4 GB of RAM, and a graphics card capable of supporting common video formats are recommended standards. This allows for effective streaming and processing of rich graphics without overwhelming the system.
Another aspect to consider when looking into how to set up cloud gaming on a budget PC is the availability of subscription options. Many cloud gaming platforms offer tiered services, which can influence the cost and the quality of the games available. It is advisable to compare different services such as NVIDIA GeForce NOW, Google Stadia, or Xbox Cloud Gaming to choose a plan that fits both your budget and gaming preferences. These platforms often provide trial periods, enabling users to test compatibility and performance before making any long-term commitments.
By addressing these fundamental components, gamers can begin to explore the emerging cloud gaming trend with a budget-friendly approach, ensuring a fulfilling entertainment experience without significant investment in hardware.
Choosing the Right Cloud Gaming Service
In the realm of cloud gaming, selecting the right service is crucial for maximizing your experience, especially when working with a budget PC. Several options are available, each offering unique features and game libraries at varying price points. One of the most popular services is NVIDIA GeForce NOW, which provides a robust selection of games playable on lower-end hardware. GeForce NOW allows users to connect their existing game libraries from platforms such as Steam and Epic Games, making it an appealing choice for those looking to save money on game purchases.
Another notable contender is Google Stadia, which stands out for its accessibility. While it requires purchasing individual games, Stadia does offer a free tier that lets gamers experience 1080p streaming. However, users should note that the library may not be as extensive as that of GeForce NOW, particularly concerning certain exclusives. On the other hand, Xbox Cloud Gaming, part of the Game Pass subscription, offers a compelling value proposition through its large selection of titles included with the subscription. This service is designed to work well on lower-spec PCs, easing the worries of performance issues that may arise with budget setups.
When considering these services, compatibility with your budget PC is essential. Most platforms recommend minimum specifications, but cloud gaming is generally forgiving as the heavy processing occurs server-side. Furthermore, most services now offer free trials, allowing potential users to gauge the experience without immediate commitment. This opportunity is particularly valuable for those looking to discover how to set up cloud gaming on a budget PC. It can significantly influence your decision as you explore these emerging cloud gaming trends, juxtaposed with your personal gaming preferences and budget considerations.
Optimizing Your PC for Cloud Gaming
To fully enjoy the emerging cloud gaming trend, it is vital to optimize your budget PC for an enhanced gaming experience. While cloud gaming can be less demanding on hardware compared to traditional gaming methods, ensuring that your system is configured to perform at its best can significantly elevate your overall gaming enjoyment. The first step in optimizing your PC is updating your graphics drivers, as having the latest version can lead to improved performance and compatibility with cloud gaming platforms.
Additionally, it is crucial to close any unnecessary applications and background processes that could drain system resources. These applications consume valuable bandwidth and processing power, possibly leading to increased lag during gameplay. Systematic resource management allows your budget PC to allocate more capacity to the cloud streaming process, ensuring a seamless gaming experience.
Furthermore, adjusting in-game settings can also provide noticeable improvements. For instance, lowering graphical settings such as texture quality, shadows, and resolution can reduce strain on your system, thus improving streaming quality. These adjustments are particularly relevant for budget PCs, which may struggle with higher graphical demands associated with some titles.
Alongside optimizing your PC’s performance, network optimization plays a significant role in cloud gaming. To achieve lower latency, ensure that your internet connection is stable and preferably wired, as this reduces interference and provides faster response times. Consider using Quality of Service (QoS) settings on your router to prioritize gaming traffic, which minimizes lag during gameplay. You might also want to conduct regular speed tests to ensure that your connection meets the recommended bandwidth for the cloud gaming service you plan to use. By implementing these optimizations, you enhance your budget PC’s capability to deliver a smoother and more enjoyable cloud gaming experience.
Setting Up Your Cloud Gaming Account
To embark on your cloud gaming journey on a budget PC, the initial step involves creating an account with a suitable cloud gaming service. Several platforms, such as Nvidia GeForce NOW, Xbox Cloud Gaming, and PlayStation Cloud Gaming, offer various game libraries and pricing structures. Begin by selecting a service that aligns with your gaming preferences and budget. Once you have decided, navigate to the service’s official website and look for the “Sign Up” or “Create Account” button.
Upon clicking this button, you will typically be prompted to provide personal information, including your email address, preferred username, and password. Ensure that your password is strong to safeguard your account. Following the account creation process, you will often receive a confirmation email. Click on the link within this email to verify your account; this step is crucial for activating your cloud gaming service.
Next, you will need to set up a payment method. Most platforms accept credit cards, debit cards, or PayPal as valid options. Navigate to the “Billing” or “Payment” section of your account settings, and follow the prompts to enter your payment information securely. Take note of any subscription plans offered; these may range from pay-as-you-go to monthly memberships that grant access to extensive game libraries.
After completing the payment setup, it’s time to explore the game library that your chosen service provides. Most cloud gaming platforms offer a user-friendly interface where you can browse or search for titles to find your favorite games. Additionally, keep an eye out for any promotional trials or discounts that may enhance your cloud gaming experience on a budget PC. If you encounter any issues during this setup process, consult the platform’s customer support or FAQs, which can often provide troubleshooting solutions specific to common problems.
Controller and Accessory Configuration
When it comes to cloud gaming on a budget PC, selecting the right controller and accessories can significantly enhance the overall gameplay experience. A myriad of controllers available today makes it easier for gamers to choose options that suit both performance and budget constraints. Whether you prefer using a traditional gamepad, a racing wheel, or even a keyboard and mouse setup, understanding how to connect these devices is crucial.
For budget-conscious gamers, one popular choice is the Xbox Wireless Controller or the PlayStation DualShock 4. Both controllers are compatible with many cloud gaming platforms, such as GeForce NOW, Xbox Cloud Gaming and others. To connect these devices to your PC, simply ensure Bluetooth is enabled if you’re using wireless versions. For wired connections, a USB cable suffices. Once connected, most platforms automatically recognize these controllers, streamlining the setup process.
If you’re looking for more economical alternatives, several third-party controllers can also deliver excellent performance without the premium price tag. Brands like Logitech and Elexa offer budget controllers that still connect easily to your PC via USB or Bluetooth. However, budget options may require specific software downloads to configure properly, so be sure to check compatibility with the cloud gaming platform you intend to use.
After connecting your controller, optimizing its configuration is essential. Tweaking the sensitivity, dead zones, and button mappings can vastly improve your gaming experience. Many cloud gaming services offer built-in settings to personalize controls for different games. Additionally, it may be beneficial to download dedicated software for further customization, especially for more complex controller layouts. This attention to detail in controller and accessory setup is critical for elevating your cloud gaming experience on a budget PC.
Game Streaming Settings and Performance Tuning
When considering how to set up cloud gaming on a budget PC, the configuration of streaming settings is vital to ensure an enjoyable gaming experience. Key factors such as resolution, frame rate, and bandwidth usage can dramatically influence performance, especially on a system with limited resources. Therefore, careful adjustments and tuning are essential.
First, you should determine the optimal resolution for your setup. Most cloud gaming services offer a range of resolutions, typically ranging from 720p to 4K. For a budget PC, starting with 720p or 1080p is advisable. These resolutions typically require less processing power, leading to smoother gameplay. However, it’s important to test these options, as some users may prefer a higher resolution with lower frame rates for specific games, while others may opt for higher frame rates at lower resolutions.
Furthermore, the frame rate is another critical aspect. In fast-paced games, frame rates of 60fps (frames per second) can vastly improve your gaming experience. However, if your budget PC is struggling, lowering the frame rate to 30fps might still provide a playable experience without extensive lag. Continuously testing and tweaking these settings will allow you to find the most enjoyable balance between graphics and performance.
Bandwidth usage is equally crucial since it defines how much internet data is utilized during gameplay. Ensure your internet connection meets the requirements specified by the cloud gaming service you choose. If limited bandwidth is a concern, reducing streaming quality or prioritizing performance over visual fidelity may be recommended. Many services provide auto-adjust features that can manage this for you, ensuring consistent gameplay.
In conclusion, proper adjustment of game streaming settings is paramount in achieving optimal performance for cloud gaming on a budget PC. By testing various configurations in resolution, frame rate, and bandwidth usage, users can enhance their gaming experience without investing in costly hardware upgrades.
Troubleshooting Common Issues
Setting up cloud gaming on a budget PC can deliver a remarkable gaming experience, but it is not without its challenges. As users embark on this journey, they may encounter various issues such as connectivity problems, latency, video quality degradation, or controller recognition difficulties. Understanding how to identify and troubleshoot these common issues is crucial for optimizing the cloud gaming experience.
One of the most frequent challenges encountered is connectivity problems. A stable internet connection is vital for effective cloud gaming. Users should ensure that they have a reliable broadband connection, ideally at least 15 Mbps for a seamless experience. If lagging occurs, users should consider using a wired Ethernet connection rather than Wi-Fi which can often be unstable due to interference. Additionally, conducting a speed test can help determine if the internet speed meets the requirements for cloud gaming.
Lag and latency issues can also arise from network congestion, particularly during peak usage times. In such cases, changing the router’s location or upgrading to a more suitable router can significantly enhance performance. Additionally, reducing the number of devices connected to the network while gaming can free up bandwidth, thus improving the overall experience.
Video quality problems frequently stem from inadequate bandwidth. Users may need to adjust the video settings within their cloud gaming platform, choosing lower resolutions or frame rates if bandwidth is limited. This adjustment not only improves playability but also reduces lag.
Finally, issues surrounding controller recognition can be frustrating. Ensuring that the controller is properly connected, configuring the settings in the cloud gaming service, and confirming compatibility is essential for smooth gameplay. Each of these troubleshooting techniques contributes to a more enjoyable gaming experience on a budget PC, empowering players to resolve issues without external assistance.
Conclusion and Future of Cloud Gaming on a Budget
As we have explored throughout this blog post, learning how to set up cloud gaming on a budget PC is not only achievable but also carries significant benefits for gamers looking to enjoy high-quality gaming experiences without the financial burden of high-end hardware. With the increasing advancements in streaming technology, many gamers are finding that they can access robust gaming environments through cloud platforms, rendering traditional hardware limitations less relevant.
The cloud gaming trend is rapidly evolving, and as more players embrace this shift, the affordability and accessibility of gaming continue to improve. Services such as NVIDIA GeForce NOW, Xbox Cloud Gaming, and others are continually optimizing their offerings. For budget gamers, this means an expanding array of options, often allowing for play on systems that would previously have been inadequate to meet the demands of modern gaming.
Looking to the future, advancements in network infrastructure and the rise of 5G technology promise to revolutionize the cloud gaming landscape further. This will likely result in reduced latency and improved streaming quality, making the experience even more seamless for budget-conscious players. Furthermore, as cloud gaming becomes more mainstream, competition among service providers may lead to better pricing structures and incentives, allowing more gamers to participate without significant investments in hardware.
To maximize your gaming experiences, it is essential to stay informed about these emerging trends in cloud gaming technology. By understanding how to set up cloud gaming on a budget PC and remaining engaged with evolving services and innovations, gamers can enjoy an expanding library of games without breaking the bank. Continued education on technological advancements will empower players to enhance their gaming experiences while maintaining financial prudence.

Understanding the Startup Failed Error
The Epic Games startup failed error is a significant issue that can impede users from accessing their library of games and related services. This message often appears when launching the Epic Games Launcher, signaling that the application cannot start properly. Understanding the underlying causes of this error is essential for troubleshooting and ultimately resolving the issue.
One of the primary triggers for the startup failed error is corrupted installation files. If any of the files necessary for the launcher to function correctly are damaged or incomplete, the application may fail to start. This scenario often occurs due to interruptions during updates or installations, which can lead to incomplete data being written to the system. Therefore, ensuring that the installation is intact is paramount when addressing this error.
Another common cause of the startup failed error is related to connectivity issues. Inadequate or unstable Wi-Fi connections can prevent the launcher from effectively communicating with Epic Games’ servers, resulting in failure to initiate. Users should check their internet connections and ensure that they have a stable and reliable network to avoid contributing factors to this issue.
Additionally, conflicts with antivirus software can also trigger the startup failed error. Occasionally, security software may misidentify the Epic Games Launcher as a threat, blocking necessary processes from executing and preventing the application from launching altogether. Configuring antivirus settings or temporarily disabling such software may be required to resolve this issue.
In summary, understanding the startup failed error involves recognizing its potential causes. By identifying the issues related to corrupted installation files, connectivity problems, and interference from antivirus software, users can better navigate the troubleshooting process and find appropriate solutions to restore access to their games and services on the Epic Games platform.
Basic Troubleshooting Steps
Experiencing the “Epic Games startup failed” message can be frustrating for gamers, but many issues can be resolved using basic troubleshooting steps. Begin by restarting your computer, as this simple action can resolve a plethora of temporary glitches that may be causing the startup failure. It refreshes your system processes and can often rectify common software issues.
Next, check your internet connectivity. A stable connection is crucial for the Epic Games Launcher to function properly. Ensure that your device is connected to the internet, and if you are using Wi-Fi, consider switching to a wired connection for increased stability. Additionally, test your internet speed to confirm that it meets the minimum requirements for the launcher. Sometimes, slow or inconsistent internet can lead to startup failure.
Another essential step is to verify that your Epic Games Launcher is up to date. Outdated software can lead to performance issues and may not connect properly to Epic’s servers. Open the launcher and check for any available updates. If there are pending updates, install them and then try launching the application again.
If you continue to see the “startup failed” message, try logging out of your Epic Games account and then logging back in. This can refresh your account settings and resolve any session-related issues that might be causing the failure. To do this, click on your profile icon in the top right corner of the launcher, select “Log Out,” and then enter your credentials to log back in.
Implementing these basic troubleshooting steps can significantly enhance your chances of resolving the issue. Following these methods while being patient can eventually pave the way to an enjoyable gaming experience without the interruption of startup complications.
Advanced Fixes for Persistent Issues
For users who are continuously encountering the “startup failed” error in the Epic Games Launcher, several advanced troubleshooting methods can be employed. While basic solutions may provide temporary relief, the following steps can offer a more comprehensive approach to resolving persistent issues effectively.
Firstly, verifying the integrity of game files is crucial. This can be done through the Epic Games Launcher by navigating to your library, selecting the game in question, and clicking on the settings (gear icon). From there, choose “Verify” to allow the launcher to check the game’s files for any corruption. If there are discrepancies, the launcher will automatically replace the problematic files, which can potentially rectify the startup issue.
Reinstalling the Epic Games Launcher is another effective step. Begin by uninstalling the current version via the Control Panel. After complete removal, head to the official Epic Games website to download the latest version of the launcher and install it on your system. This process often resolves issues that stem from corrupted launcher files that might be causing the startup failed error.
In addition to these steps, checking your firewall settings is essential. Sometimes, firewall configurations may inadvertently block the Epic Games Launcher from connecting to necessary servers. Ensure that both the launcher and the respective games are whitelisted in your firewall settings, allowing uninterrupted access and functionality.
Lastly, ensuring that Universal Windows Platform (UWP) apps are up to date can affect the overall performance of the games. Regularly check the Windows Store for any pending updates for UWP apps. Keeping these apps current can help alleviate compatibility issues that contribute to the startup failed error.
By following these advanced troubleshooting techniques, users can effectively target the underlying issues and enhance their gaming experience with the Epic Games Launcher.
When to Seek Further Assistance
While many users can resolve the “startup failed” issue on their own with various troubleshooting techniques, there are instances where it is advisable to seek further assistance. If you encounter persistent error messages that remain unresolved after implementing standard fixes, it could be a sign that the problem is more complex than initially thought. Consistently receiving the same error message repeatedly can indicate underlying issues that require professional intervention. Additionally, if you experience startup failures across multiple devices using the Epic Games platform, this may signal a broader incompatibility or system-wide problem that necessitates expert help.
In cases where your attempts to address the issue yield no results, consider reaching out to Epic Games support for guidance. They possess the expertise to assist you in identifying and rectifying the problem. You can find contact information for Epic Games support on their official website, where various support options, including live chat, email, and customer service hotlines, are available. When communicating with their support team, be prepared to provide detailed information about your issue, including error messages encountered and the troubleshooting steps you have already taken. This information will aid their team in assessing your situation effectively.
Furthermore, engaging with community forums can also be beneficial. Many users facing similar issues share their experiences and solutions on platforms such as Reddit or dedicated gaming forums. By participating in these discussions, you may uncover alternative solutions or tips that are not widely known. Remember, seeking help is not a sign of defeat but an essential step in the troubleshooting process. Whether you turn to official support or community resources, don’t hesitate to ask for help to ensure a smooth gaming experience and to avoid prolonged frustration with the “how to fix Epic Games startup failed” dilemma.

Introduction
The Epic Games Launcher serves as a key platform for accessing a myriad of games and content provided by Epic Games. It is an essential tool for gamers who wish to purchase, download, and manage their gaming library efficiently. However, users may sometimes encounter technical issues, one of the most frustrating being the error code 0xc000007b. This particular error can halt the options of downloading or playing games, leading to considerable inconvenience.
Error code 0xc000007b is indicative of a problem related to application compatibility. Specifically, it often indicates that there are issues concerning the architecture of the files involved, typically suggesting a mix-up between 32-bit and 64-bit versions. This error may surface under a variety of scenarios, such as attempting to launch a game or when trying to update the Epic Games Launcher itself. The unpredictability of this error can cause distress and frustration among users, as it prevents them from enjoying their favorite games.
This blog post aims to provide an in-depth guide on how to fix Epic Games Launcher error 0xc000007b. Here, we will explore various methods and steps that users can take to mitigate this issue effectively. Whether the problem arises from missing files, compatibility concerns, or outdated software, we will cover practical solutions to restore functionality to the Epic Games Launcher. By following our guidance, users will engage with clear, methodical approaches to resolving this error, ultimately enhancing their gaming experience and interaction with the platform.
Understanding the Error 0xc000007b
The error code 0xc000007b is a common issue encountered by users when attempting to launch applications or games, particularly through platforms like the Epic Games Launcher. This error typically arises from problems associated with application and system files, specifically regarding inconsistencies between 32-bit and 64-bit versions of the software. When a user tries to run a 64-bit application using a 32-bit system file, or vice versa, the 0xc000007b error may occur, resulting in confusion and frustration.
This error is often linked to mixed architecture within the executable files and dynamic link libraries (DLLs). For instance, if an application requires a specific 64-bit DLL file and the system has only the 32-bit version, it will lead to a conflict that manifests as the 0xc000007b error. Users might witness such issues while launching titles from the Epic Games Launcher or any other game distribution platform.
<padditionally, 0xc000007b="" a="" about="" also="" application="" being="" but="" c++="" can="" clear="" compatible="" components="" confusion="" corrupted="" creates="" despite="" does="" due="" encounters="" error,="" error.="" essential="" fail="" files,="" gameplay="" guidance="" halt="" incorrectly="" installed="" it="" lack="" leads="" load="" missing="" not="" of="" often="" only="" operating="" or="" p="" problem.<pto 0xc000007b="" 32-bit="" 64-bit="" a="" aiming="" all="" and="" application="" architecture,="" are="" arises="" between="" check="" code="" common="" components="" conflicts="" correctly="" corruption,="" crucial="" effectively.="" ensure="" error="" file="" files.="" fix="" for="" from="" impediment.
Check for Corrupt Installation Files
When encountering the Epic Games Launcher error 0xc000007b, one of the first troubleshooting steps is to check for corrupt installation files. Corrupted files can disrupt the launcher’s functionality, causing various gaming issues including the specific error in question. Fortunately, the Epic Games Launcher offers a straightforward method to verify the integrity of your game files, which can help in addressing this concern.
To begin, launch the Epic Games Launcher on your computer, and navigate to your Library. Here, you will see a list of all your installed games. Locate the game that is presenting the error and click on the three dots next to its title. From the drop-down menu, select the “Verify” option. This process initiates a scan of the game files.
The Epic Games Launcher will compare your installed files against the original game files stored on its servers. If any corrupt or missing files are detected, the launcher will automatically replace or repair them during this verification process. This step is crucial because even a single corrupted file can trigger the error 0xc000007b, leading to game crashes or prevent the game from launching at all.
After the verification is complete, you will receive a notification indicating whether any files were repaired or redownloaded. It is advisable to restart the launcher following this process to allow for any changes to take effect. Once restarted, attempt to launch your game again. If the error persists, further troubleshooting steps may be necessary, but checking for corrupt installation files is a critical first action that could resolve the error effectively.
Reinstall vs Repair the Epic Games Launcher
When encountering the Epic Games Launcher error 0xc000007b, users are often faced with two primary options: repairing the launcher or uninstalling and then reinstalling it. These two approaches serve different purposes and can effectively resolve the error, depending on the underlying cause.
To repair the Epic Games Launcher, follow these steps: first, navigate to the Control Panel by searching for it in the Windows search bar. Once there, select “Programs” and then “Programs and Features.” Locate the Epic Games Launcher in the list, click on it, and choose the “Repair” option. This process will check the installation for any corrupted files and will attempt to rectify them. Repairing is generally a quicker solution and is ideal when minor issues or corrupt files are suspected, as it eliminates the need to reinstall the entire application.
On the other hand, if the repair option does not resolve the 0xc000007b error, a complete uninstallation followed by reinstallation of the Epic Games Launcher may be necessary. To uninstall, return to the “Programs and Features” section, select the launcher, and choose “Uninstall.” After the uninstallation is complete, visit the official Epic Games website to download the latest version of the launcher. This process ensures that any and all corrupted files are removed, providing a fresh installation which typically resolves deeper-seated issues that a repair might not address.
Both methods come with their own set of advantages. Repairing is less time-consuming and preserves user settings, while a full reinstallation allows for a complete reset of the application. It is important to try repairing first as it requires less effort and could potentially solve the problem. If the error persists, proceed with the complete reinstallation for a more comprehensive fix to the Epic Games Launcher error 0xc000007b.
Update Graphics Drivers
Keeping your graphics drivers up to date is essential for optimizing gaming performance and ensuring compatibility with various software, including the Epic Games Launcher. Outdated drivers can lead to various issues, including the well-known error 0xc000007b, which can hinder your gaming experience. Modern games rely on updated drivers to function correctly, as manufacturers frequently release updates that improve performance, fix bugs, and add support for new game titles.
To check for outdated drivers, you can follow these steps:
- Press Windows + X and select “Device Manager” from the list.
- In Device Manager, expand the “Display adapters” section.
- Right-click your graphics card and select “Properties.”
- Go to the “Driver” tab, and you will see the driver version and date. Compare this with the latest version available on the manufacturer’s website.
If you find that your drivers are out of date, installing the latest drivers for NVIDIA or AMD graphics cards is straightforward:
For NVIDIA Graphics Cards:
Visit the NVIDIA website and navigate to the “Drivers” section. Use the search tool to identify your graphics card model. Download the most recent driver compatible with your system. Run the installer and follow the on-screen prompts to complete the installation.
For AMD Graphics Cards:
Go to the AMD website and access the “Drivers & Support” page. Select your graphics card model from the drop-down menus. Download the latest driver package and run the installation file. Follow the prompts provided to install the updates.
By keeping your graphics drivers updated, you not only improve your gaming performance but also reduce the likelihood of encountering errors like the Epic Games Launcher error 0xc000007b. A fully functioning graphics driver is pivotal for maximizing your overall gaming experience.
Install Missing or Corrupted Visual C++ Redistributables
Visual C++ Redistributables play a crucial role in ensuring that applications, including video games, run smoothly on Windows systems. These libraries provide the necessary runtime components that are essential for running applications developed with Microsoft Visual C++. When these redistributables are missing or corrupted, you may encounter various issues, one of which is the Epic Games Launcher error 0xc000007b. This error typically indicates that the application is trying to access a DLL file that cannot be found or is incompatible with the existing system files.
To resolve this issue, it is vital to check for any missing or damaged Visual C++ Redistributables on your system. To do this, go to the Control Panel and navigate to “Programs and Features.” Look for entries labeled “Microsoft Visual C++ Redistributable” along with the year of release next to them. Take note if any version is missing or if the version seems outdated compared to the specifications for the game you’re trying to run. Generally, it is advisable to have the Visual C++ Redistributables for several years installed, as games may depend on multiple versions for compatibility.
If you identify that certain redistributables are missing or corrupted, the next step is to download the latest versions directly from the official Microsoft website. To do so, navigate to the Microsoft Download Center, search for “Visual C++ Redistributable,” and select the versions required for your system architecture (x86 or x64). Download the installer, run it, and follow the prompts to complete the installation process. After successfully installing the necessary redistributables, reboot your computer for the changes to take effect. This step can effectively resolve the Epic Games Launcher error 0xc000007b and allow you to launch your games without further issues.
Run the Game as Administrator
Many users experience the Epic Games Launcher error 0xc000007b due to inadequate permissions associated with the application. Running programs without proper authorization can lead to functionality issues, causing applications to crash or not launch at all. This error can often be resolved by executing the Epic Games Launcher and its associated games with elevated administrator privileges. This process ensures that the application has the necessary permissions to operate smoothly.
To run the Epic Games Launcher as an administrator, follow these simple steps:
- Locate the Epic Games Launcher shortcut on your desktop or find it through the Start Menu.
- Right-click on the Epic Games Launcher icon.
- Select “Run as administrator” from the context menu that appears.
After executing these steps, the launcher will open with elevated permissions, which can sometimes rectify the error at hand. However, it is crucial to assess whether running as an administrator resolves the issue. If you continue to experience the error, you may want to try running individual games through a similar process.
To run a specific game as an administrator:
- Navigate to the game’s installation folder, typically located within the Epic Games directory.
- Locate the game’s executable file (.exe).
- Right-click on the executable file and select “Run as administrator.”
Executing the game in this manner may improve its performance and functionality, potentially eliminating the Epic Games Launcher error 0xc000007b. Ensuring that applications are granted the necessary permissions is a fundamental step in troubleshooting various software issues, ultimately leading to a smoother gaming experience.
Check for Windows Updates
Maintaining an updated Windows operating system is crucial for ensuring optimal performance and compatibility, especially when gaming applications such as the Epic Games Launcher are concerned. A common cause of the Epic Games Launcher error 0xc000007b can be attributed to outdated components of Windows, which may lead to compatibility problems with certain applications. Therefore, it is imperative to check for and install any available Windows updates to rectify these types of issues.
To check for Windows updates, begin by navigating to the Settings menu on your Windows computer. You can do this by clicking on the Start menu and selecting the gear icon, which represents Settings. Within the Settings window, locate and click on the ‘Update & Security’ option. This section will lead you to the Windows Update tab, where you can view the current status of your system in regard to updates.
Once in the Windows Update tab, click on the ‘Check for updates’ button. Windows will automatically search for any pending updates and notify you of their availability. Should updates be found, proceed to download and install them. Depending on the size of the updates, the process may take some time, and your system may require a restart during installation.
Installing these updates is of paramount importance, as they often include bug fixes and enhancements that can solve problems related to the Epic Games Launcher error 0xc000007b. Once the updates have been successfully installed, it is advisable to restart your computer to ensure all changes take effect. After rebooting, attempt to launch the Epic Games Launcher again to check if the issue has been resolved.
Conclusion
In addressing the significant issue of the Epic Games Launcher error 0xc000007b, several effective solutions have been outlined to assist users in resolving this frustrating error. Initially, it is crucial to confirm that the game files have been installed correctly and are free from corruption. Verifying the integrity of these files through the Epic Games Launcher can provide a direct resolution.
Another essential step includes ensuring that all necessary software dependencies, such as Microsoft Visual C++ Redistributables and .NET Framework, are correctly installed and updated. Outdated or missing components can often trigger the error, and restoring these can eliminate the problem. Furthermore, updating graphics drivers enhances compatibility with the Epic Games Launcher and can be an instrumental factor in resolving this error.
Reinstalling the Epic Games Launcher itself has also proved to be an effective method in rectifying persistent issues. This process not only repairs potential corrupted files but also resets the application settings back to their defaults. For users operating in an environment subjected to administrative restrictions, running the launcher as an administrator can help by bypassing these restrictions and providing the necessary permissions for smooth operation.
Following these suggested methods, such as verifying file integrity, updating essential software, reinstalling the launcher, and ensuring proper permissions, can significantly improve the situation for users encountering the error 0xc000007b. Adhering to the instructions meticulously will generally resolve the problems at hand, allowing for an enhanced gaming experience. We encourage readers to implement these strategies with care to restore functionality and enjoyment while using the Epic Games Launcher.
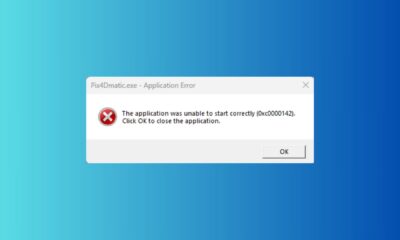

How to Fix 0xc0000142 Error on Windows 10: Easy Step-by-Step Guide
Ever fired up your favorite game, only to get slapped with the frustrating 0xc0000142 error on Windows 10? It’s like...


What affects aim accuracy in Apex Legends?
Key Points Factors Influencing Aim Accuracy Aim accuracy in Apex Legends depends on several factors, and understanding them can help...

Best Sensitivity Settings for Apex Legends on Controller
Ever landed in Apex Legends, ready to dominate, only to miss every shot because your aim feels like it’s stuck...

 Games Like2 years ago
Best Games Like Unblocked Games 77 | Top Alternatives
- Gaming1 year ago
Free Fire Best Sensitivity Settings For Headshot
- Top 102 years ago
The Top 20 Android Horror Games to Play with Friends

 Game Room Ideas11 months ago
52 Incredible Game Room Ideas to Elevate Your Home Entertainment
- Tutorials2 years ago
How to Fix the PS5 Green Screen – Tips To Try
- Tutorials11 months ago
How to Play Fishbowl Game: Rules, Regulations, and Tips
- Top 1011 months ago
10 Best Offline Mobile Games For Long Car Rides 2024
- Top 102 years ago
The 25 Best Offline iPhone Games to Play Without Internet