Killstreak Released Year
Killstreak 2020
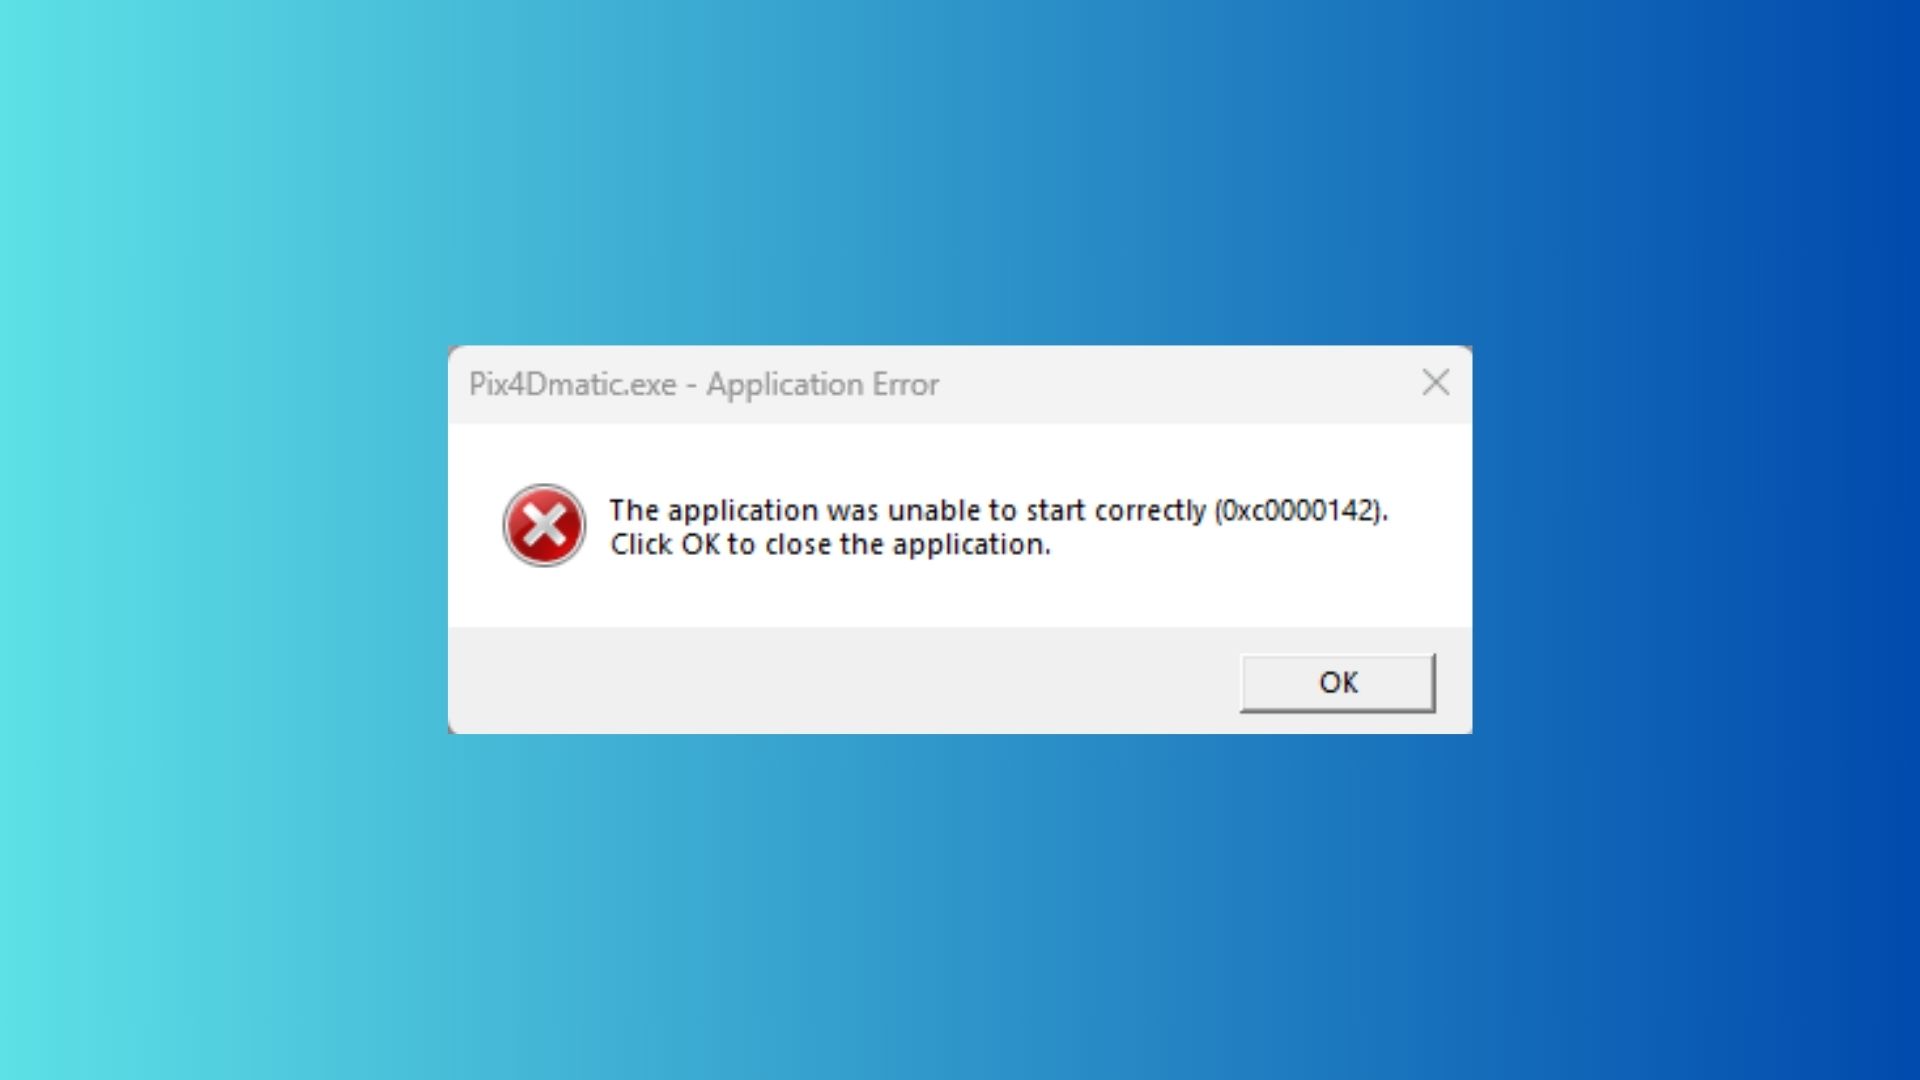
Ever fired up your favorite game, only to get slapped with the frustrating 0xc0000142 error on Windows 10? It’s like your PC is throwing a tantrum, refusing to launch your app or game. Don’t worry—you’re not alone, and there’s a fix that works like a charm. I’ve been there, and after a clean Windows 10 install and some key software setups, I got rid of this error for good. Stick with me, and I’ll walk you through every step to banish this error and get back to gaming or working smoothly. Ready to dive in? Let’s fix that 0xc0000142 error together!
Key Takeaways
- The 0xc0000142 error stops apps or games from launching due to corrupted files, missing DLLs, or outdated drivers.
- A clean Windows 10 installation using a USB created with Rufus can fix the issue.
- Installing Visual C++, DirectX, and .NET Framework 4.8 after the clean install is crucial.
- Adding a free antivirus like Bitdefender helps keep your system secure.
- Regular updates and safe software practices prevent the error from coming back.
Short Answer to Fix 0xc0000142 Error
The 0xc0000142 error usually pops up when your system is missing key files or has corrupted ones, especially for games. The best fix? Do a clean Windows 10 install using a USB made with Rufus and the official Windows 10 ISO. After that, install Visual C++, DirectX, .NET Framework 4.8, and a free antivirus like Bitdefender. This combo wipes out the error and keeps your PC running smoothly.
What Causes the 0xc0000142 Error?
So, what’s behind this annoying error? The 0xc0000142 error happens when an application—often a game like GTA V or Call of Duty—can’t start because something’s gone wrong with your system. Think of it like trying to start a car with a missing spark plug. The main culprits are:
- Corrupted system files: Windows files get damaged, maybe from a bad shutdown or malware.
- Missing DLLs: These are tiny files apps need to run, and if they’re gone, you’re stuck.
- Outdated drivers: Old graphics or system drivers can mess things up.
- Incompatible software: Some programs just don’t play nice with Windows 10.
This error loves to crash the party when you’re trying to game, but don’t sweat it. A clean install and some software updates will get you back on track. Curious about how to do it? Let’s break it down.
How to Perform a Clean Windows 10 Installation
A clean install is like giving your PC a fresh start. It wipes out all the junk and errors, including that pesky 0xc0000142. Here’s how to do it, step by step. Don’t skip any part, and you’ll be golden.
Step 1: Download the Latest Windows 10 ISO
First, you need the official Windows 10 ISO file, which is like the blueprint for your new system. Head to Microsoft’s official website and grab the Media Creation Tool. This tool is super easy to use, even if you’re not a tech wizard.
- Open the Media Creation Tool and select “Create installation media for another PC.”
- Choose your language, Windows 10 edition (usually Home or Pro), and 64-bit architecture.
- Pick “ISO file” and save it to your computer. This file is big, so make sure you’ve got a few gigs of free space.
This ISO is your ticket to a fresh Windows install. Got it downloaded? Awesome, let’s move on.
Step 2: Create a Bootable USB with Rufus
Now, you’ll turn that ISO into a bootable USB drive using Rufus, a free tool that’s dead simple to use. You’ll need a USB drive with at least 8GB of space—make sure it’s empty because this process wipes it clean.
- Plug in your USB drive and open Rufus.
- Select your USB drive from the list at the top.
- Click “Select” and find the Windows 10 ISO you downloaded.
- Keep the default settings (like NTFS file system) and hit “Start.” This takes a few minutes, so grab a snack.
- When it’s done, you’ll have a USB ready to install Windows 10.
Your USB is now a magic wand for fixing your PC. Ready to use it? Let’s keep going.
Step 3: Format Hard Drive and Install Windows 10
Here’s where things get real—you’re going to wipe your hard drive and install a fresh Windows 10. But first, back up your files! Photos, videos, game saves—copy them to an external drive or cloud storage like Google Drive. Once you’re backed up, follow these steps:
- Plug your USB into your PC and restart it.
- Enter your PC’s BIOS by pressing a key like F2, F12, or Delete during boot (check your PC’s manual for the exact key).
- Set the USB as the first boot device in the BIOS.
- Save and exit. Your PC will boot from the USB.
- Follow the Windows 10 setup prompts: choose your language, click “Install Now,” and enter your product key (or skip it if you don’t have one).
- Select “Custom: Install Windows only” to do a clean install.
- Delete all partitions on your main drive (where Windows is installed) and select the unallocated space to install Windows. This formats the drive, wiping everything.
- Let Windows install. Your PC will restart a few times—don’t panic, it’s normal.
Once it’s done, you’ll have a brand-new Windows 10 setup. No more 0xc0000142 error… yet. We’ve got a few more steps to lock it in.
Step 4: Post-Installation Setup
Your fresh Windows is like a blank canvas—it needs some key software to run games and apps without errors. Here’s what to install, and why it matters.
Install Visual C++ Redistributables
Visual C++ is like the glue that holds many games and apps together. Without it, you’ll get errors like 0xc0000142. Go to Microsoft’s Visual C++ download page and grab the latest versions (usually 2015-2022, both x86 and x64).
- Download and run the installer.
- Follow the prompts to install. It’s quick and painless.
- Restart your PC if prompted.
This step fixes missing DLL issues that cause the 0xc0000142 error. Done? Let’s move to the next piece.
Install DirectX
DirectX is a must for gaming—it helps your graphics card talk to games. Without it, games might not launch, or you’ll see that dreaded error. You can get it from Microsoft’s DirectX page or TechPowerUp.
- Download the DirectX End-User Runtime Web Installer.
- Run it and let it install the latest DirectX components.
- Restart your PC to make sure everything’s set.
This ensures your games run smoothly. One more key install to go.
Install .NET Framework 4.8
.NET Framework is another behind-the-scenes helper that apps and games need. Head to Microsoft’s .NET Framework 4.8 download page and grab it.
- Download the installer and run it.
- Follow the prompts to install. It’s straightforward.
- Restart your PC if needed.
This fixes compatibility issues that can trigger the 0xc0000142 error. Almost there!
Install Bitdefender Free Trial (Optional)
To keep your PC safe from malware that can cause errors, install a good antivirus. I used Bitdefender’s free 30-day trial, and it’s awesome for catching threats without slowing your system. Go to Bitdefender’s website to download it.
- Download the free trial installer.
- Run it and follow the setup wizard.
- Let Bitdefender scan your system to catch any lurking issues.
This step isn’t mandatory, but it’s a smart move to keep your PC clean. Want to know if it worked? Let’s test it.
Step 5: Test Games and Applications
Now it’s time to see if the error’s gone. Fire up the game or app that was giving you the 0xc0000142 error. For me, after installing Visual C++, DirectX, and .NET Framework, every game launched perfectly. If it works, you’re done! If not, double-check that you installed all the software correctly or try updating your graphics drivers from your GPU maker’s website (like NVIDIA or AMD).
How to Avoid 0xc0000142 Errors in the Future
You’ve fixed the error, but how do you keep it from coming back? Here are some easy tips to keep your PC running like a dream:
- Update Windows regularly: Go to Settings > Update & Security and check for updates. New patches fix bugs that cause errors.
- Stick to trusted software: Don’t download sketchy apps from random websites—they can mess up your system.
- Keep drivers fresh: Update your graphics and other drivers from the manufacturer’s site.
- Run system checks: Use commands like
sfc /scannowin Command Prompt to fix corrupted files. You can also useDISM /Online /Cleanup-Image /RestoreHealthfor deeper repairs. - Use an antivirus: Stick with Bitdefender or another trusted antivirus to block malware that corrupts DLLs.
Follow these, and you’ll keep that 0xc0000142 error in the rearview mirror. But what if you have more questions? I’ve got you covered.
Frequently Asked Questions
What is the 0xc0000142 error in Windows 10?
It’s an error that stops apps or games from launching, usually because of missing or corrupted files like DLLs, outdated drivers, or broken system files.
Can I fix 0xc0000142 without reinstalling Windows?
Sometimes, yes—try updating Visual C++, DirectX, or drivers. But a clean install, like described here, is the most reliable fix for stubborn cases.
Is it safe to format my hard drive?
Yes, as long as you back up your files first. Formatting wipes everything, so save photos, videos, and game saves to an external drive or cloud.
Why do I need Visual C++ and DirectX for games?
These are like toolkits games use to run properly. Without them, you’ll get errors like 0xc0000142 because the game can’t find the files it needs.
How does Bitdefender help prevent errors like 0xc0000142?
Bitdefender stops malware that can corrupt system files or DLLs, which are common causes of the 0xc0000142 error.
Final Thoughts on Fixing 0xc0000142 Error
Dealing with the 0xc0000142 error is a pain, but a clean Windows 10 install, paired with the right software like Visual C++, DirectX, and .NET Framework, can make it disappear. I’ve walked you through every step, from downloading the Windows ISO to testing your games. Just make sure to back up your files before formatting, and you’ll be back to gaming or working in no time. Did this fix work for you? Drop a comment below or hit me up for more tech tips. Let’s keep those errors away for good!

Key Points
- Research suggests practice and training improve aim accuracy in Apex Legends.
- It seems likely that hardware settings, like mouse sensitivity, affect aim performance.
- The evidence leans toward movement and positioning impacting aim, especially strafing.
- Game mechanics, such as recoil patterns, likely play a role in accuracy.
- Aim assist for controller players is controversial, boosting accuracy but debated for fairness.
- Network stability, like low latency, seems to enhance aim responsiveness.
- Psychological factors, such as focus, may influence aim under pressure.
Factors Influencing Aim Accuracy
Aim accuracy in Apex Legends depends on several factors, and understanding them can help improve your gameplay. Here’s a breakdown for beginners:
- Player Skill and Practice: Regular practice, both in-game and with tools like aim trainers, is key. The firing range is great for warming up, and tools like 3D Aim Trainer offer routines to sharpen skills.
- Hardware and Settings: Your mouse sensitivity (25-45cm for a 360° turn is a common range) and graphics settings (e.g., FOV 90-105, V-Sync off) can make a big difference. Turning off mouse acceleration helps keep movements predictable.
- Movement and Positioning: Strafing and counter-strafing while aiming, plus using cover, can improve accuracy. Stopping briefly to shoot can stabilize your aim, especially in fights.
- Game Mechanics: Knowing weapon recoil patterns and the game’s high time-to-kill (TTK) helps you track targets longer and hit shots. Headshots are crucial for maximizing damage.
- Aim Assist: For controller players, aim assist pulls the crosshair toward enemies, boosting accuracy (e.g., controller players average 33.57% accuracy vs. 25.72% for mouse and keyboard). It’s a debated topic, with some feeling it’s unfair.
- Network Stability: Low latency ensures responsive aiming, while high ping can delay shots. Stable connections, possibly aided by tools like GearUp Booster, help reduce lag.
- Psychological Factors: Staying calm and focused can improve aim, especially in high-pressure moments. Confidence from practice also helps.
This mix of factors shows aim accuracy isn’t just about talent—it’s about optimizing your setup and skills.
Detailed Survey Note: Factors Affecting Aim Accuracy in Apex Legends
This detailed survey note explores the multifaceted elements influencing aim accuracy in Apex Legends, a popular battle royale game known for its fast-paced action and tactical depth. Aimed at casual gamers and those new to the game, this section provides a comprehensive breakdown, ensuring accessibility with simple language and practical insights. It builds on the key points and direct answer, offering a deeper dive into each factor, supported by research and community insights from various sources.
Overview of Aim Accuracy in Apex Legends
Apex Legends, developed by Respawn Entertainment, is a game where every shot counts, especially in its high time-to-kill (TTK) environment, averaging over 3 seconds for eliminations. This means players often need to track targets longer, making aim accuracy a critical skill. Whether you’re using a controller or mouse and keyboard (MnK), your ability to hit shots depends on a blend of personal skill, equipment, game mechanics, and external conditions. Let’s break it down step by step.
1. Player Skill and Practice: The Foundation of Accuracy
Research suggests that consistent practice is the cornerstone of improving aim accuracy. Apex Legends offers in-game tools like the firing range, ideal for warming up before matches. Spending 10-20 minutes here can help, including long-range tracking and short-range crosshair placement. For example, enabling friendly fire for 1v1 gunfights with friends simulates real combat, enhancing your ability to track moving targets.
External aim trainers, such as 3D Aim Trainer, provide structured routines. This free tool, available on PC, Android, and iOS, offers modes like 1v1 or co-op Zombie Survival, tracking your aiming abilities over time. Daily 30-minute sessions can improve aim by 20-30% long-term, focusing on tracking, flicking, and reaction time. Consistency builds muscle memory, making your reactions faster and more instinctive, which is crucial given the game’s high TTK.
2. Hardware and Settings: Optimizing Your Setup
Your hardware and in-game settings significantly impact aim accuracy. Mouse sensitivity is a key factor, with recommendations ranging from 25-45cm for a 360° turn, though personal preference matters. For instance, some pros use 30-32cm for balance, while others prefer 36cm. Aim down sights (ADS) sensitivity should be set to 1.00 for a natural feel across scopes, ensuring consistency.
Mouse acceleration should be turned off to avoid unpredictable cursor movement, which can throw off your aim. Graphics settings also play a role, affecting visibility and performance. Recommended settings include:
- V-Sync: OFF to reduce input lag
- Field of View (FOV): 90-105 (or 105-119 horizontal FOV), balancing enemy size and awareness (higher FOV makes enemies smaller, harder to hit; lower makes them bigger but limits vision)
- Disable effects like ambient occlusion, volumetric lighting, and impact marks if they hurt FPS, and set model detail to high, effects detail to low for clarity.
These tweaks ensure your setup supports smooth, responsive aiming, especially important for tracking fast-moving targets.
3. Hand-Eye Coordination: Making Aim Instinctive
Hand-eye coordination is essential, particularly in a game requiring sustained tracking due to high TTK. It’s about syncing your hand movements with what you see on screen, making aiming feel natural. Practice drills, like those in aim trainers, challenge this skill—tracking moving targets or flicking between points helps reduce the natural lag between brain and hand.
For example, frequent practice with 3D Aim Trainer routines can make your aim unconscious, improving accuracy by building muscle memory. This is vital in Apex Legends, where spotting and tracking enemies quickly can give you the edge, especially in chaotic fights.
4. Movement and Positioning: Aiming While on the Move
Movement isn’t just about dodging bullets; it’s about setting up your shots. Strafing (moving side to side) and counter-strafing (stopping briefly to shoot) are skills that enhance aim accuracy. Strafing makes you a harder target, forcing enemies to adjust, while counter-strafing stabilizes your aim for cleaner shots. Practice sprinting, then standing still for a quick second to shoot—it’s a technique that takes time but pays off in fights.
Positioning also matters. Using high ground, cover, or flanking opportunities can give you clearer sightlines, reducing the need for frantic adjustments. For instance, engaging from behind cover lets you take controlled shots, improving accuracy compared to walking into sightlines. This interplay between movement and aim is crucial, as seen in community tips emphasizing terrain and Legend abilities for better positioning.
5. Game Mechanics: Understanding the Rules of Engagement
Apex Legends’ game mechanics directly affect aim accuracy. Weapon recoil patterns are a prime example—each gun has a unique kick, like the R-301’s vertical recoil or the Flatline’s side pull. Learning these patterns through firing range practice lets you compensate, keeping your crosshair on target. Headshots are particularly important, maximizing damage and reducing TTK, so always aim for the head in tense situations.
The game’s high TTK, averaging over 3 seconds, means you need sustained tracking accuracy rather than quick, snap shots. Understanding weapon selection also helps—guns like the R-301 are beginner-friendly due to low recoil, while the Wingman rewards precision. These mechanics aren’t just technical; they shape how you approach every fight, making knowledge as important as skill.
6. Aim Assist: A Controller Advantage and Controversy
For controller players, aim assist is a significant factor, gently pulling the crosshair toward enemies to aid tracking and hitting shots. Data shows controller players average 33.57% accuracy compared to 25.72% for MnK, a 30.5% difference, with top controller players like Evo1ved Xander reaching 51.10% accuracy. This feature, designed to level the playing field, is controversial, with some MnK players calling it a “cheat” and arguing it slants competitive gameplay.
Community discussions highlight calls for balance, like splitting lobbies by input type or nerfing aim assist, expected in future seasons. Controller players, however, see it as user-friendly, essential for competing with MnK’s precision. Whether you’re for or against, aim assist undeniably boosts accuracy for controller users, but it’s a hot topic with no clear resolution yet.
7. Network and Latency: The Invisible Enemy
Even with perfect aim, a bad connection can ruin your shots. Latency, or ping, measures the time data travels between your device and the server, and high ping (e.g., above 100ms) can delay your inputs, making aiming feel sluggish. Stability is equally important—packet loss or disconnections cause hiccups, throwing off your aim mid-fight.
To mitigate this, choose the nearest server for lower latency and consider tools like GearUp Booster, which optimize your connection for smoother gameplay. A stable network ensures your inputs translate instantly, giving you that split-second advantage in fights, especially critical in Apex Legends’ fast-paced battles.
8. Psychological Factors: The Mental Game
Your mindset can make or break your aim. Staying calm under pressure is crucial—panic shots often miss, while controlled shots hit. Focus is key, especially in chaotic fights, and confidence from regular practice can boost performance. Treat every match as a learning opportunity, not just a win-or-lose scenario, to build resilience.
For example, even pros have off days, but maintaining focus and not letting missed shots tilt you helps. Psychological factors like these aren’t measurable like latency, but they’re real—your mental state can influence how well you execute all the technical skills we’ve discussed.
Summary Table: Key Factors and Their Impact
To organize this information, here’s a table summarizing the factors, their impact, and practical tips:
| Factor | Impact on Aim Accuracy | Practical Tips |
|---|---|---|
| Player Skill and Practice | Builds muscle memory, improves tracking and flicking | Use firing range, practice 30 mins daily with 3D Aim Trainer |
| Hardware and Settings | Affects responsiveness and visibility | Set mouse sensitivity 25-45cm/360°, turn off acceleration, optimize graphics settings |
| Hand-Eye Coordination | Makes aiming instinctive, reduces reaction lag | Practice tracking drills, build muscle memory through consistency |
| Movement and Positioning | Enhances shot stability, reduces exposure | Strafe, counter-strafe, use cover, engage from high ground |
| Game Mechanics | Influences tracking needs, recoil control | Learn recoil patterns, aim for headshots, understand TTK |
| Aim Assist | Boosts controller accuracy, controversial | Controller players can keep it on, MnK players advocate for balance |
| Network and Latency | Affects input responsiveness, can cause delays | Choose nearest server, use GearUp Booster for stability |
| Psychological Factors | Impacts focus and confidence under pressure | Stay calm, build confidence through practice, treat losses as learning |
This table highlights how each factor interplays, showing that aim accuracy is a holistic skill, not just about pulling the trigger.
Conclusion and Recommendations
Aim accuracy in Apex Legends is a complex interplay of personal skill, equipment, game knowledge, and external conditions. For casual gamers, start with practice—spend time in the firing range, tweak your settings, and focus on one area at a time, like movement or recoil control. Controller players should leverage aim assist but be aware of community debates, while all players should ensure a stable connection to avoid lag.
Remember, improvement is a journey. Keep practicing, stay patient, and use resources like 3D Aim Trainer and GearUp Booster for extra help. With time, you’ll hit those clutch shots and climb the ranks, one accurate shot at a time.
Ever landed in Apex Legends, ready to dominate, only to miss every shot because your aim feels like it’s stuck in mud? Or maybe you’re whipping around too fast, overshooting enemies like you’re in a cartoon? Finding the perfect controller sensitivity settings can feel like cracking a secret code, but it’s the key to nailing those clutch moments in the Outlands. Whether you’re a newbie dropping into Kings Canyon or a seasoned player grinding ranked, this guide will walk you through the best sensitivity settings for Apex Legends on controller, step by step. Stick around, and by the end, you’ll be beaming enemies with confidence—promise!
Key Takeaways
- Balanced Sensitivity: Look Sensitivity at High (4) and ADS Sensitivity at Default (3) work for most players, offering speed and control.
- Button Layouts: Evolved or Button Puncher layouts help with movement techniques like crouch-spamming.
- Deadzone Settings: Set Look and Movement Deadzones to Small to reduce lag, but adjust for stick drift.
- Advanced Look Controls (ALC): Fine-tune sensitivity for personalized control, starting with Yaw at 200 and Pitch at 150.
- Aim Assist: Keep Target Compensation ON to maximize controller aim assist, despite recent nerfs.
Answer to Your Problem
The best sensitivity settings for Apex Legends on controller are Look Sensitivity at High (4), ADS Sensitivity at Default (3), Look and Movement Deadzones at Small, and Response Curve at 8 for a steady feel. Use the Evolved or Button Puncher preset for better movement, keep Trigger Deadzone at Default, and turn on Target Compensation for aim assist. For more control, try Advanced Look Controls (ALC) with Yaw Speed at 200, Pitch Speed at 150, and Deadzone at 5%. These settings balance speed, precision, and responsiveness for most players.
Why Sensitivity Matters in Apex Legends
Sensitivity settings control how fast your character turns and aims with a controller. Get it wrong, and you’re either moving like a snail or spinning like a top. Apex Legends is a fast-paced battle royale where split-second reactions can mean the difference between a win and a quick trip back to the lobby. The right sensitivity lets you track enemies smoothly, flick to targets quickly, and stay in control during chaotic fights. Since controllers rely on thumbsticks, finding that sweet spot is crucial—especially with aim assist nerfs in Season 22 making precision even tougher.
Let’s break it down: Look Sensitivity handles how fast you turn when not aiming down sights (hip-fire), while ADS Sensitivity controls your aim speed when scoped in. Deadzones prevent unwanted movement from stick drift, and Response Curve tweaks how your stick inputs translate to in-game movement. Sound complicated? Don’t worry—I’ll explain each part clearly.
Choosing the Right Controller Preset
Before diving into sensitivity, let’s talk about your controller layout. Apex Legends offers several presets, but two stand out for controller players: Evolved and Button Puncher. These layouts make movement techniques like crouch-spamming (rapidly crouching to dodge shots) easier, which is a game-changer in close fights.
- Evolved Preset: Moves crouch to the right stick (R3) and jump to the left bumper (L1). This lets you crouch-strafe and shoot at the same time without awkward finger gymnastics. It’s great for aggressive players who love Legends like Octane or Wraith.
- Button Puncher Preset: Swaps melee and crouch, putting crouch on R3. It’s beginner-friendly and helps you slide and dodge smoothly. If you’re new or prefer hip-firing, this is a solid pick.
How to Set It Up:
- Go to the Settings menu in Apex Legends.
- Select the “Controller” tab.
- Choose “Button Layout” and pick Evolved or Button Puncher.
- Set Crouch to “Hold” for easier crouch-spamming.
Try both presets in the Firing Range to see which feels natural. Evolved might take some getting used to, but it’s worth it for the mobility boost. Curious about other layouts? Stick with these for now—they’re pro-approved for a reason.
Best Sensitivity Settings for Most Players
Now, let’s get to the meat of it: sensitivity. The goal is to find a balance where you can turn quickly to spot enemies but still aim precisely when the bullets start flying. Based on pro settings and community feedback, here’s a setup that works for most controller players:
- Look Sensitivity: High (4) – Fast enough to turn and react without feeling sluggish.
- ADS Sensitivity: Default (3) – Slightly slower than Look Sensitivity for better control when aiming down sights.
- Per Optic ADS Sensitivity: Off – Keeps aiming consistent across all scopes.
- Response Curve: 8 – Creates a steady, predictable feel, similar to the Classic setting.
Why These Work:
High (4) Look Sensitivity lets you scan your surroundings quickly, which is key in Apex’s fast-paced fights. Default (3) ADS Sensitivity gives you more precision for tracking enemies, especially at mid-range. Turning off Per Optic ADS Sensitivity avoids confusion when switching between scopes—nobody wants to relearn aiming for every gun. The Response Curve at 8 feels smooth and linear, making your stick movements predictable.
How to Set It Up:
- In Settings, go to the “Controller” tab.
- Find “Look Sensitivity” and set it to 4 (High).
- Set “ADS Sensitivity” to 3 (Default).
- Turn “Per Optic ADS Sensitivity” to Off.
- Set “Response Curve” to 8.
Head to the Firing Range and test these settings. Try tracking dummies or sliding around to feel the speed. If it feels too fast or slow, tweak by one level and test again. Patience is key—your muscle memory needs time to adjust.
Fine-Tuning with Advanced Look Controls (ALC)
Want to take your settings to the next level? Advanced Look Controls (ALC) let you customize sensitivity with pinpoint accuracy. It’s like tuning a car: a bit intimidating at first, but the results are worth it. ALCs let you adjust Yaw Speed (horizontal movement), Pitch Speed (vertical movement), Deadzones, and more. Here’s a solid starting point:
- Deadzone: 5% – Start at 0% and increase by 1% until stick drift stops.
- Outer Threshold: 2% – Minimizes lag at the stick’s edges.
- Response Curve: 8 – Steady and predictable, like the Classic preset.
- Yaw Speed: 200 – Fast horizontal turns for quick reactions.
- Pitch Speed: 150 – Slower vertical movement for better aim control (75% of Yaw).
- Turning Extra Yaw/Pitch: 0 – Keeps sensitivity consistent.
- Ramp-Up Time/Delay: 0 – Instant sensitivity transitions.
- ADS Yaw/Pitch Speeds: 150/100 – Lower than hip-fire for precision.
Why Use ALC?:
ALCs give you granular control, letting you tailor sensitivity to your playstyle. For example, higher Yaw Speed helps you flick to enemies behind you, while lower Pitch Speed keeps your aim steady when tracking vertically. The Deadzone setting eliminates stick drift, which is a lifesaver if your controller’s seen better days.
How to Set It Up:
- In Settings, go to “Controller” > “Advanced Look Controls.”
- Set Deadzone to 0%, test in-game, and increase by 1% until drift stops (aim for 5%).
- Set Outer Threshold to 2% and Response Curve to 8.
- Set Yaw Speed to 200 and Pitch Speed to 150.
- Keep Turning Extra Yaw/Pitch and Ramp-Up settings at 0.
- Mirror ADS settings but lower Yaw to 150 and Pitch to 100.
Spend time in the Firing Range tweaking these. If 200 Yaw feels too zippy, drop it to 180. If you’re overshooting vertically, lower Pitch to 120. ALCs are all about experimentation, so don’t be afraid to play around. Pro tip: write down your settings before changing them, so you can revert if things go wonky.
Deadzone and Trigger Settings
Deadzones and triggers are the unsung heroes of controller settings. They prevent annoying issues like stick drift and overly sensitive inputs, keeping your aim smooth.
- Look Deadzone: Small – Registers small stick movements for responsive aiming. Increase to Medium if you notice drift.
- Movement Deadzone: Small – Ensures quick movement inputs. Adjust upward for older controllers.
- Trigger Deadzone: Default – Works for most controllers. Only increase if triggers fire too easily.
Why These Matter:
Look Deadzone controls how far you need to move the stick before the game registers it. A Small setting makes aiming feel snappy, but if your character moves without input (stick drift), bump it up. Movement Deadzone does the same for movement—Small keeps things responsive. Trigger Deadzone stops accidental trigger pulls, which is crucial for precise shooting.
How to Test and Adjust:
- Set both Look and Movement Deadzones to Small.
- In the Firing Range, stand still and see if your aim or character moves on its own.
- If drift occurs, increase Deadzone to Medium and retest.
- Keep Trigger Deadzone at Default unless your triggers feel too sensitive.
Got an older controller? You might need a higher Deadzone. If drift persists even at Medium, it’s time to consider a new controller—check out this guide to the best Apex Legends controllers for recommendations.
Maximizing Aim Assist
Aim assist is a hot topic in Apex Legends, especially after the Season 22 nerf dropped controller aim assist from 0.4 to 0.3 in crossplay lobbies. It’s still a powerful tool, though, and you’ll want to make sure it’s working for you.
- Target Compensation: ON – Enables aim assist for tracking enemies.
- Melee Target Compensation: ON – Helps with melee accuracy.
How It Works:
Aim assist slightly slows your crosshair when it’s near an enemy, making it easier to track them. The nerf means it’s less sticky, so your sensitivity settings are even more important now. Keeping both Target Compensation settings ON ensures you’re getting the full benefit, especially in close-range fights.
How to Set It Up:
- In Settings, go to “Controller” > “Advanced Look Controls.”
- Scroll to “Target Compensation” and “Melee Target Compensation.”
- Set both to ON.
Practice in the Firing Range to get a feel for aim assist. Try hip-firing and ADS-ing at moving dummies to see how it locks on. If you’re struggling post-nerf, spend extra time practicing tracking—this guide on improving aim in Apex Legends can help.
Other Gameplay Settings to Optimize
Sensitivity isn’t the only thing that affects your performance. These gameplay settings can clean up your experience and boost your movement:
- Auto Sprint: OFF – Lets you walk slowly for sneaky plays. Turn ON if your sticks are stiff.
- Taking Damage Closes Deathbox: OFF – Allows armor swaps without interruption.
- FOV Ability Scaling: OFF – Prevents visual clutter, especially for Legends like Octane.
- Sprint View Shake: Minimal – Reduces screen wobble for clearer aiming.
How to Set It Up:
- In Settings, go to the “Gameplay” tab.
- Turn off Auto Sprint, Taking Damage Closes Deathbox, and FOV Ability Scaling.
- Set Sprint View Shake to Minimal.
These tweaks reduce distractions and keep you focused in fights. For example, turning off Taking Damage Closes Deathbox lets you swap armor mid-fight, which can save your skin. Test them in a match to feel the difference.
Testing and Adjusting Your Settings
You’ve got the settings dialed in, but they won’t feel perfect right away. Muscle memory takes time, so here’s how to make sure your setup works for you:
- Hit the Firing Range: Spend 10-15 minutes testing your sensitivity. Shoot dummies, practice slides, and try crouch-spamming.
- Play Casual Matches: Jump into pubs to test your settings in real fights. Focus on how your aim feels in close and mid-range engagements.
- Tweak Gradually: If you’re overshooting targets, lower Look Sensitivity by 1. If you’re too slow, bump it up. Small changes prevent frustration.
- Warm Up Daily: Spend 5 minutes in the Firing Range before matches to get your aim locked in.
Pro players like ImperialHal tweak their settings constantly, so don’t be afraid to experiment. Check out ImperialHal’s controller settings for inspiration.
FAQ
Q: What’s the best controller preset for beginners?
A: Button Puncher is great for beginners. It swaps melee and crouch (R3), making it easier to slide and dodge while keeping things simple.
Q: Should I use ALC settings or stick to defaults?
A: Start with default settings (Look Sensitivity 4, ADS 3) for simplicity. If you want more control, try ALC with Yaw at 200 and Pitch at 150, but test thoroughly.
Q: How do I fix stick drift?
A: Set Look and Movement Deadzones to Small. If drift persists, increase to Medium or consider a new controller.
Q: Does aim assist still work after the nerf?
A: Yes, but it’s weaker (0.3 in crossplay lobbies). Keep Target Compensation ON and practice tracking to compensate.
Conclusion
Getting the best sensitivity settings for Apex Legends on controller isn’t just about copying pro setups—it’s about finding what clicks for you. Start with Look Sensitivity at 4, ADS at 3, and Deadzones at Small for a balanced feel. Experiment with Evolved or Button Puncher presets to boost your movement, and dive into ALC if you’re ready to fine-tune. Don’t forget to keep aim assist ON and test everything in the Firing Range. With a bit of practice, you’ll be hitting headshots and outmaneuvering enemies like a pro. So, what are you waiting for? Jump into Apex, tweak those settings, and start racking up those dubs
For more tips, check out Dot Esports’ Apex Legends guides or Setup.gg’s controller recommendations. Happy gaming!


How to Fix 0xc0000142 Error on Windows 10: Easy Step-by-Step Guide
Ever fired up your favorite game, only to get slapped with the frustrating 0xc0000142 error on Windows 10? It’s like...


What affects aim accuracy in Apex Legends?
Key Points Factors Influencing Aim Accuracy Aim accuracy in Apex Legends depends on several factors, and understanding them can help...

Best Sensitivity Settings for Apex Legends on Controller
Ever landed in Apex Legends, ready to dominate, only to miss every shot because your aim feels like it’s stuck...

 Games Like2 years ago
Best Games Like Unblocked Games 77 | Top Alternatives
- Gaming1 year ago
Free Fire Best Sensitivity Settings For Headshot
- Top 102 years ago
The Top 20 Android Horror Games to Play with Friends

 Game Room Ideas10 months ago
52 Incredible Game Room Ideas to Elevate Your Home Entertainment
- Tutorials2 years ago
How to Fix the PS5 Green Screen – Tips To Try
- Tutorials11 months ago
How to Play Fishbowl Game: Rules, Regulations, and Tips
- Top 1011 months ago
10 Best Offline Mobile Games For Long Car Rides 2024
- Tutorials11 months ago
Yandex Games Progress Lost? Here’s How to Recover and Prevent Future Issues