Gaming Troubleshooting
How to Fix Epic Games Installation Corrupt Issues

Understanding the Problem
The term “Epic Games installation corrupt” refers to a situation where the installation files of the Epic Games Launcher are damaged or incomplete, resulting in operational failures. This corruption can prevent users from launching the launcher, downloading games, or accessing their library. One of the most common signs of a corrupt installation is the inability to open the Epic Games Launcher at all. Users may experience blank screens, freezing, or an error message indicating that the launcher cannot be started. These issues often stem from corrupted files or incorrectly installed updates.
Another prevalent symptom of a corrupt installation is download failures. Users may find that their game downloads are interrupted or that progress ceases unexpectedly. Occasionally, the launcher may show a persistent error message when attempting to update or install new games, further complicating access to the gaming environment. Additionally, performance issues can arise, such as long loading times or unresponsive features, which can contribute to the gaming experience being significantly hindered.
Several factors can lead to the corruption of the Epic Games installation. Common causes include incomplete downloads due to network interruptions, unexpected system shutdowns, or conflicts with antivirus software that mistakenly categorizes legitimate installation files as threats. Furthermore, storing files on unreliable storage devices or changing the installation directory without ensuring all dependencies are properly configured can also result in a corrupt installation. Understanding these signs and potential causes can help users identify whether their installation is in a corrupt state, guiding them toward effective solutions to rectify the issue and restore functionality to the Epic Games Launcher.
Initial Troubleshooting Steps
When users encounter an epic games installation corrupt error, it is essential to follow a structured approach to address the problem effectively. The first step involves verifying that the computer meets the necessary system requirements for running the Epic Games Launcher. Check the official Epic Games website for minimum and recommended specifications. If the hardware or software falls short, it may lead to installation issues.
Next, a simple yet often overlooked solution is to restart your computer. Restarting can refresh the system’s resources and resolve minor glitches that may interfere with the installation process. After rebooting, attempt to initiate the installation again to see if the issue persists.
Furthermore, ensuring that there is a stable and robust internet connection is crucial. A deteriorating or intermittent internet connection can lead to incomplete file downloads, resulting in an epic games installation corrupt problem. It is advisable to connect via a wired network rather than Wi-Fi, as this tends to provide a more reliable connection. Also, pause any other downloads or streaming activities that may consume bandwidth, ensuring a focused and error-free installation.
If the installation continues to be problematic after verifying system requirements, restarting the device, and confirming internet stability, it may be necessary to delve deeper into specific troubleshooting measures. However, these initial steps offer a solid foundation for addressing common issues that could contribute to a corrupt installation of Epic Games. Persisting issues may then warrant further investigation or seeking assistance from technical support resources available within the Epic Games community.
Verifying Game Files
One of the most effective methods to resolve issues related to an “epic games installation corrupt” is by verifying game files through the Epic Games Launcher. This feature allows users to detect any file corruption or missing files and rectify these problems without the need for a full reinstallation of the game. The verification process is straightforward, and following these steps can significantly improve your gaming experience.
To begin, open the Epic Games Launcher on your computer. Once the application is launched, navigate to your library, where all your installed games are displayed. Locate the game that you suspect has a corrupt installation. Hover over the game icon, and you will see three dots or an options menu. Click on this menu to reveal additional options.
In the options menu, you will find the “Verify” option. Click this to start the verification process. The Epic Games Launcher will begin scanning your game files and comparing them against the latest versions available on the server. This can take some time, depending on the size of the game and your system specifications. During this process, the launcher will automatically download any missing files and repair any corrupt ones that it detects.
It is important to note that the verification process does not affect your saved game data, ensuring that your progress is preserved. Once the verification is complete, you will receive a message indicating whether any issues were found and if they have been resolved. This method is often sufficient for addressing “epic games installation corrupt” issues, saving you the hassle of complete uninstallation and reinstallation while efficiently ensuring your game files are intact.
Repairing the Epic Games Launcher
To address the common issue of an epic games installation corrupt, it is essential to first consider the state of the Epic Games Launcher itself. Repairing the launcher can often resolve persistent problems that might not be linked directly to individual game installations. The process to repair the launcher is straightforward and can be executed through two primary methods: the Control Panel or the settings within the Epic Games Launcher. Each of these options serves to rectify any issues that may be affecting how the launcher operates, which may contribute to installation corruption.
First, to repair the launcher via the Control Panel, begin by navigating to it through the Windows Start menu. From there, click on ‘Programs and Features’ to see a list of installed applications. Locate ‘Epic Games Launcher’ in the list, click on it, and then select the ‘Uninstall’ option. However, this may sound drastic, but don’t worry—this process does not fully remove the launcher. Instead, you will be provided with an option to ‘Repair’. By selecting this option, Windows will initiate a repair process that can fix any corrupt files within the Epic Games Launcher.
Alternatively, if you prefer to work directly within the launcher, open it and direct yourself to the settings by clicking the gear icon in the bottom left corner. Here, you may find an option to verify or repair the installation of the launcher. This method checks for any corrupted files and replaces them with fresh copies, combatting the effects of an epic games installation corrupt. After executing either option, it’s advisable to restart your computer and launch the Epic Games Launcher again to see if the issues have been resolved effectively. This simple repair can alleviate many problems and restore functionality to your gaming experience.
Uninstalling and Reinstalling the Launcher
If you are experiencing issues like an epic games installation corrupt message, one effective solution is to completely uninstall and then reinstall the Epic Games Launcher. This process ensures that any underlying problems with the current installation are eliminated. To begin, it is crucial to back up any game data that you wish to keep. Navigate to the folder where your games are installed, typically found in the C:Program FilesEpic Games directory, and copy the entire folder to a secure location, such as an external hard drive or cloud storage. This way, you can easily restore your games after the reinstallation is complete.
Once your data is secured, proceed to uninstall the Epic Games Launcher. Open the Control Panel on your Windows PC, select “Programs and Features,” then locate the Epic Games Launcher in the list. Right-click it and choose “Uninstall.” Follow the prompts to remove the launcher from your system. To ensure that all components are completely removed, navigate to the program files directory. Delete any remaining folders associated with Epic Games. Additionally, you may want to check the AppData folder (found in C:Users[YourUsername]AppData) for any leftover files related to the launcher and delete those as well.
After uninstalling, it is time for the reinstallation. Visit the official Epic Games website to download the latest version of the Epic Games Launcher. This download will provide a fresh installation free from any corruption that may have caused previous issues. Once the download is complete, open the installer and follow the prompts to install the launcher. After the installation is complete, you can now restore your backed-up game data to their respective locations. By completing these steps, many users find they have resolved any epic games installation corrupt issues and can resume their gaming experience without interruption.
Clearing Cache and App Data
One effective method to resolve the epic games installation corrupt issues is to clear the cache and app data associated with the Epic Games Launcher. This process can help refresh the application by deleting any corrupted files that may be causing installation errors. When the cache is full or contains corrupted data, it can lead to various problems, including failed installations or updates, making this step essential for optimal performance.
To begin, you must first locate the directory where the Epic Games Launcher stores its cache. Typically, this can be found in the following path: C:Users[YourUsername]AppDataLocalEpicGamesLauncherSaved. In this folder, there will be a subfolder named ‘Cache.’ Once you have located the cache folder, you can simply delete the contents inside. It is recommended to close the Epic Games Launcher before proceeding with this action to ensure that no active processes are using the files.
In addition to clearing the cache, you may also want to remove other data that could be causing issues. In the same path, you will find the ‘Temp’ folder, where temporary files related to installations are stored. Consider deleting this folder’s contents as well. After clearing the cache and temporary files, restart your computer and relaunch the Epic Games Launcher. This action can help restore the application to its default state, potentially resolving the epic games installation corrupt problems you were facing.
By regularly clearing the cache and app data, you can prevent persistent problems, ensuring that your gaming experience remains smooth and uninterrupted. This practice not only helps in fixing current issues but also aids in preventing future complications related to the Epic Games Launcher.
Check for Software Conflicts
When attempting to install Epic Games, one common issue that users may face is the corruption of the installation process. A significant factor contributing to these corrupt installations can be software conflicts, particularly from antivirus programs, firewalls, or other active applications. These types of software can inadvertently interfere with the installation process, leading to errors or incomplete setups.
Antivirus software is designed to protect your system from malicious threats, yet it sometimes misidentifies benign files as harmful. This misidentification can result in the antivirus software quarantining or blocking essential files required for the Epic Games installation, leading to a corrupted installation. To mitigate this issue, users can temporarily disable their antivirus during the installation. However, it is essential to remember to reactivate it once the installation is complete to maintain system protection.
Firewall settings can also pose challenges during the installation of Epic Games. A firewall’s primary function is to monitor and control incoming and outgoing network traffic based on predetermined security rules. If the firewall settings are too restrictive, they may prevent necessary communication between your device and Epic Games’ servers, culminating in a failed installation. Configuring the firewall to allow traffic from the Epic Games client can help remedy this conflict. Users should review their firewall’s security settings and grant access to the application to ensure a successful installation.
Other programs running in the background can create additional conflicts. Applications that demand a lot of system resources or those that interact closely with network capabilities could potentially conflict with the installation process. It is advisable to close any unnecessary applications, disabling any overlays or additional services that could interfere. By taking these steps, users can significantly decrease the chance of encountering an epic games installation corrupt issue, facilitating a smoother installation experience.
Updating Graphics Drivers and System Software
To mitigate the issue of an epic games installation corrupt, it is vital to ensure that both your graphics drivers and system software are up to date. Outdated or incompatible drivers can contribute to installation errors and overall performance problems. Regularly checking for updates helps maintain system integrity and allows for smoother operation of applications, including game installers.
Firstly, to check your graphics drivers, you can use the Device Manager on Windows. Simply right-click on the Start menu and select “Device Manager.” From there, expand the “Display adapters” section to identify your graphics card. Right-click on the graphic device listed and choose “Update driver.” You will then have the option to search automatically for updated driver software; this will allow Windows to find the latest version available online.
Alternatively, you can visit the manufacturer’s website, such as NVIDIA or AMD, to download the latest drivers manually. This ensures you have the most compatible driver for your specific hardware, which is crucial if you encounter an epic games installation corrupt issue. Follow the prompts to download and install the driver, restarting your system if necessary to ensure changes take effect.
In addition to updating graphics drivers, it is essential to keep your operating system up to date. Windows provides updates that fix bugs, improve security, and enhance system performance. Navigate to “Settings,” then “Update & Security,” and click on “Check for updates.” Installing available updates can prevent installation corruption by resolving underlying system conflicts.
Keeping your graphics drivers and system software updated not only reduces the risk of facing issues like an epic games installation corrupt but also enhances your overall computing experience. Regular maintenance of these components is an essential practice for any user who wishes to enjoy uninterrupted access to their gaming library.
Seeking Additional Help and Support
If you find yourself persistently encountering issues related to an epic games installation corrupt, even after following standard troubleshooting steps, it might be time to seek additional help. Epic Games offers various resources dedicated to aiding users in resolving installation-related issues. Firstly, the Epic Games support website serves as a primary hub where you can access detailed guides and FAQs. This section often covers a wide array of problems, including those stemming from a corrupt installation.
In addition to the official support, utilizing community forums can be beneficial. Platforms such as Reddit and the Epic Games Community Forum provide a space where users discuss their experiences, share solutions, and offer advice on overcoming installation hurdles. Searching through these forums may lead you to someone who has experienced the same epic games installation corrupt issue and found a workaround or solution. Engaging in these discussions can not only enhance your understanding but also foster a sense of community.
Furthermore, it may prove helpful to reach out directly to Epic Games customer support. They can provide personalized assistance and technical support tailored to your specific situation. Whether it involves the reinstallation of the Epic Games launcher, troubleshooting system compatibility, or any other installation-related concern, the support team is equipped to guide you effectively.
For real-time problem-solving, consider following Epic Games’ official social media pages or online support chat options, when available. These platforms often share timely updates on known issues and can provide immediate feedback for reported problems. By employing these resources, you can enhance your chances of resolving the epic games installation corrupt issues and get back to enjoying your gaming experience.

Key Points
- Research suggests practice and training improve aim accuracy in Apex Legends.
- It seems likely that hardware settings, like mouse sensitivity, affect aim performance.
- The evidence leans toward movement and positioning impacting aim, especially strafing.
- Game mechanics, such as recoil patterns, likely play a role in accuracy.
- Aim assist for controller players is controversial, boosting accuracy but debated for fairness.
- Network stability, like low latency, seems to enhance aim responsiveness.
- Psychological factors, such as focus, may influence aim under pressure.
Factors Influencing Aim Accuracy
Aim accuracy in Apex Legends depends on several factors, and understanding them can help improve your gameplay. Here’s a breakdown for beginners:
- Player Skill and Practice: Regular practice, both in-game and with tools like aim trainers, is key. The firing range is great for warming up, and tools like 3D Aim Trainer offer routines to sharpen skills.
- Hardware and Settings: Your mouse sensitivity (25-45cm for a 360° turn is a common range) and graphics settings (e.g., FOV 90-105, V-Sync off) can make a big difference. Turning off mouse acceleration helps keep movements predictable.
- Movement and Positioning: Strafing and counter-strafing while aiming, plus using cover, can improve accuracy. Stopping briefly to shoot can stabilize your aim, especially in fights.
- Game Mechanics: Knowing weapon recoil patterns and the game’s high time-to-kill (TTK) helps you track targets longer and hit shots. Headshots are crucial for maximizing damage.
- Aim Assist: For controller players, aim assist pulls the crosshair toward enemies, boosting accuracy (e.g., controller players average 33.57% accuracy vs. 25.72% for mouse and keyboard). It’s a debated topic, with some feeling it’s unfair.
- Network Stability: Low latency ensures responsive aiming, while high ping can delay shots. Stable connections, possibly aided by tools like GearUp Booster, help reduce lag.
- Psychological Factors: Staying calm and focused can improve aim, especially in high-pressure moments. Confidence from practice also helps.
This mix of factors shows aim accuracy isn’t just about talent—it’s about optimizing your setup and skills.
Detailed Survey Note: Factors Affecting Aim Accuracy in Apex Legends
This detailed survey note explores the multifaceted elements influencing aim accuracy in Apex Legends, a popular battle royale game known for its fast-paced action and tactical depth. Aimed at casual gamers and those new to the game, this section provides a comprehensive breakdown, ensuring accessibility with simple language and practical insights. It builds on the key points and direct answer, offering a deeper dive into each factor, supported by research and community insights from various sources.
Overview of Aim Accuracy in Apex Legends
Apex Legends, developed by Respawn Entertainment, is a game where every shot counts, especially in its high time-to-kill (TTK) environment, averaging over 3 seconds for eliminations. This means players often need to track targets longer, making aim accuracy a critical skill. Whether you’re using a controller or mouse and keyboard (MnK), your ability to hit shots depends on a blend of personal skill, equipment, game mechanics, and external conditions. Let’s break it down step by step.
1. Player Skill and Practice: The Foundation of Accuracy
Research suggests that consistent practice is the cornerstone of improving aim accuracy. Apex Legends offers in-game tools like the firing range, ideal for warming up before matches. Spending 10-20 minutes here can help, including long-range tracking and short-range crosshair placement. For example, enabling friendly fire for 1v1 gunfights with friends simulates real combat, enhancing your ability to track moving targets.
External aim trainers, such as 3D Aim Trainer, provide structured routines. This free tool, available on PC, Android, and iOS, offers modes like 1v1 or co-op Zombie Survival, tracking your aiming abilities over time. Daily 30-minute sessions can improve aim by 20-30% long-term, focusing on tracking, flicking, and reaction time. Consistency builds muscle memory, making your reactions faster and more instinctive, which is crucial given the game’s high TTK.
2. Hardware and Settings: Optimizing Your Setup
Your hardware and in-game settings significantly impact aim accuracy. Mouse sensitivity is a key factor, with recommendations ranging from 25-45cm for a 360° turn, though personal preference matters. For instance, some pros use 30-32cm for balance, while others prefer 36cm. Aim down sights (ADS) sensitivity should be set to 1.00 for a natural feel across scopes, ensuring consistency.
Mouse acceleration should be turned off to avoid unpredictable cursor movement, which can throw off your aim. Graphics settings also play a role, affecting visibility and performance. Recommended settings include:
- V-Sync: OFF to reduce input lag
- Field of View (FOV): 90-105 (or 105-119 horizontal FOV), balancing enemy size and awareness (higher FOV makes enemies smaller, harder to hit; lower makes them bigger but limits vision)
- Disable effects like ambient occlusion, volumetric lighting, and impact marks if they hurt FPS, and set model detail to high, effects detail to low for clarity.
These tweaks ensure your setup supports smooth, responsive aiming, especially important for tracking fast-moving targets.
3. Hand-Eye Coordination: Making Aim Instinctive
Hand-eye coordination is essential, particularly in a game requiring sustained tracking due to high TTK. It’s about syncing your hand movements with what you see on screen, making aiming feel natural. Practice drills, like those in aim trainers, challenge this skill—tracking moving targets or flicking between points helps reduce the natural lag between brain and hand.
For example, frequent practice with 3D Aim Trainer routines can make your aim unconscious, improving accuracy by building muscle memory. This is vital in Apex Legends, where spotting and tracking enemies quickly can give you the edge, especially in chaotic fights.
4. Movement and Positioning: Aiming While on the Move
Movement isn’t just about dodging bullets; it’s about setting up your shots. Strafing (moving side to side) and counter-strafing (stopping briefly to shoot) are skills that enhance aim accuracy. Strafing makes you a harder target, forcing enemies to adjust, while counter-strafing stabilizes your aim for cleaner shots. Practice sprinting, then standing still for a quick second to shoot—it’s a technique that takes time but pays off in fights.
Positioning also matters. Using high ground, cover, or flanking opportunities can give you clearer sightlines, reducing the need for frantic adjustments. For instance, engaging from behind cover lets you take controlled shots, improving accuracy compared to walking into sightlines. This interplay between movement and aim is crucial, as seen in community tips emphasizing terrain and Legend abilities for better positioning.
5. Game Mechanics: Understanding the Rules of Engagement
Apex Legends’ game mechanics directly affect aim accuracy. Weapon recoil patterns are a prime example—each gun has a unique kick, like the R-301’s vertical recoil or the Flatline’s side pull. Learning these patterns through firing range practice lets you compensate, keeping your crosshair on target. Headshots are particularly important, maximizing damage and reducing TTK, so always aim for the head in tense situations.
The game’s high TTK, averaging over 3 seconds, means you need sustained tracking accuracy rather than quick, snap shots. Understanding weapon selection also helps—guns like the R-301 are beginner-friendly due to low recoil, while the Wingman rewards precision. These mechanics aren’t just technical; they shape how you approach every fight, making knowledge as important as skill.
6. Aim Assist: A Controller Advantage and Controversy
For controller players, aim assist is a significant factor, gently pulling the crosshair toward enemies to aid tracking and hitting shots. Data shows controller players average 33.57% accuracy compared to 25.72% for MnK, a 30.5% difference, with top controller players like Evo1ved Xander reaching 51.10% accuracy. This feature, designed to level the playing field, is controversial, with some MnK players calling it a “cheat” and arguing it slants competitive gameplay.
Community discussions highlight calls for balance, like splitting lobbies by input type or nerfing aim assist, expected in future seasons. Controller players, however, see it as user-friendly, essential for competing with MnK’s precision. Whether you’re for or against, aim assist undeniably boosts accuracy for controller users, but it’s a hot topic with no clear resolution yet.
7. Network and Latency: The Invisible Enemy
Even with perfect aim, a bad connection can ruin your shots. Latency, or ping, measures the time data travels between your device and the server, and high ping (e.g., above 100ms) can delay your inputs, making aiming feel sluggish. Stability is equally important—packet loss or disconnections cause hiccups, throwing off your aim mid-fight.
To mitigate this, choose the nearest server for lower latency and consider tools like GearUp Booster, which optimize your connection for smoother gameplay. A stable network ensures your inputs translate instantly, giving you that split-second advantage in fights, especially critical in Apex Legends’ fast-paced battles.
8. Psychological Factors: The Mental Game
Your mindset can make or break your aim. Staying calm under pressure is crucial—panic shots often miss, while controlled shots hit. Focus is key, especially in chaotic fights, and confidence from regular practice can boost performance. Treat every match as a learning opportunity, not just a win-or-lose scenario, to build resilience.
For example, even pros have off days, but maintaining focus and not letting missed shots tilt you helps. Psychological factors like these aren’t measurable like latency, but they’re real—your mental state can influence how well you execute all the technical skills we’ve discussed.
Summary Table: Key Factors and Their Impact
To organize this information, here’s a table summarizing the factors, their impact, and practical tips:
| Factor | Impact on Aim Accuracy | Practical Tips |
|---|---|---|
| Player Skill and Practice | Builds muscle memory, improves tracking and flicking | Use firing range, practice 30 mins daily with 3D Aim Trainer |
| Hardware and Settings | Affects responsiveness and visibility | Set mouse sensitivity 25-45cm/360°, turn off acceleration, optimize graphics settings |
| Hand-Eye Coordination | Makes aiming instinctive, reduces reaction lag | Practice tracking drills, build muscle memory through consistency |
| Movement and Positioning | Enhances shot stability, reduces exposure | Strafe, counter-strafe, use cover, engage from high ground |
| Game Mechanics | Influences tracking needs, recoil control | Learn recoil patterns, aim for headshots, understand TTK |
| Aim Assist | Boosts controller accuracy, controversial | Controller players can keep it on, MnK players advocate for balance |
| Network and Latency | Affects input responsiveness, can cause delays | Choose nearest server, use GearUp Booster for stability |
| Psychological Factors | Impacts focus and confidence under pressure | Stay calm, build confidence through practice, treat losses as learning |
This table highlights how each factor interplays, showing that aim accuracy is a holistic skill, not just about pulling the trigger.
Conclusion and Recommendations
Aim accuracy in Apex Legends is a complex interplay of personal skill, equipment, game knowledge, and external conditions. For casual gamers, start with practice—spend time in the firing range, tweak your settings, and focus on one area at a time, like movement or recoil control. Controller players should leverage aim assist but be aware of community debates, while all players should ensure a stable connection to avoid lag.
Remember, improvement is a journey. Keep practicing, stay patient, and use resources like 3D Aim Trainer and GearUp Booster for extra help. With time, you’ll hit those clutch shots and climb the ranks, one accurate shot at a time.
Ever landed in Apex Legends, ready to dominate, only to miss every shot because your aim feels like it’s stuck in mud? Or maybe you’re whipping around too fast, overshooting enemies like you’re in a cartoon? Finding the perfect controller sensitivity settings can feel like cracking a secret code, but it’s the key to nailing those clutch moments in the Outlands. Whether you’re a newbie dropping into Kings Canyon or a seasoned player grinding ranked, this guide will walk you through the best sensitivity settings for Apex Legends on controller, step by step. Stick around, and by the end, you’ll be beaming enemies with confidence—promise!
Key Takeaways
- Balanced Sensitivity: Look Sensitivity at High (4) and ADS Sensitivity at Default (3) work for most players, offering speed and control.
- Button Layouts: Evolved or Button Puncher layouts help with movement techniques like crouch-spamming.
- Deadzone Settings: Set Look and Movement Deadzones to Small to reduce lag, but adjust for stick drift.
- Advanced Look Controls (ALC): Fine-tune sensitivity for personalized control, starting with Yaw at 200 and Pitch at 150.
- Aim Assist: Keep Target Compensation ON to maximize controller aim assist, despite recent nerfs.
Answer to Your Problem
The best sensitivity settings for Apex Legends on controller are Look Sensitivity at High (4), ADS Sensitivity at Default (3), Look and Movement Deadzones at Small, and Response Curve at 8 for a steady feel. Use the Evolved or Button Puncher preset for better movement, keep Trigger Deadzone at Default, and turn on Target Compensation for aim assist. For more control, try Advanced Look Controls (ALC) with Yaw Speed at 200, Pitch Speed at 150, and Deadzone at 5%. These settings balance speed, precision, and responsiveness for most players.
Why Sensitivity Matters in Apex Legends
Sensitivity settings control how fast your character turns and aims with a controller. Get it wrong, and you’re either moving like a snail or spinning like a top. Apex Legends is a fast-paced battle royale where split-second reactions can mean the difference between a win and a quick trip back to the lobby. The right sensitivity lets you track enemies smoothly, flick to targets quickly, and stay in control during chaotic fights. Since controllers rely on thumbsticks, finding that sweet spot is crucial—especially with aim assist nerfs in Season 22 making precision even tougher.
Let’s break it down: Look Sensitivity handles how fast you turn when not aiming down sights (hip-fire), while ADS Sensitivity controls your aim speed when scoped in. Deadzones prevent unwanted movement from stick drift, and Response Curve tweaks how your stick inputs translate to in-game movement. Sound complicated? Don’t worry—I’ll explain each part clearly.
Choosing the Right Controller Preset
Before diving into sensitivity, let’s talk about your controller layout. Apex Legends offers several presets, but two stand out for controller players: Evolved and Button Puncher. These layouts make movement techniques like crouch-spamming (rapidly crouching to dodge shots) easier, which is a game-changer in close fights.
- Evolved Preset: Moves crouch to the right stick (R3) and jump to the left bumper (L1). This lets you crouch-strafe and shoot at the same time without awkward finger gymnastics. It’s great for aggressive players who love Legends like Octane or Wraith.
- Button Puncher Preset: Swaps melee and crouch, putting crouch on R3. It’s beginner-friendly and helps you slide and dodge smoothly. If you’re new or prefer hip-firing, this is a solid pick.
How to Set It Up:
- Go to the Settings menu in Apex Legends.
- Select the “Controller” tab.
- Choose “Button Layout” and pick Evolved or Button Puncher.
- Set Crouch to “Hold” for easier crouch-spamming.
Try both presets in the Firing Range to see which feels natural. Evolved might take some getting used to, but it’s worth it for the mobility boost. Curious about other layouts? Stick with these for now—they’re pro-approved for a reason.
Best Sensitivity Settings for Most Players
Now, let’s get to the meat of it: sensitivity. The goal is to find a balance where you can turn quickly to spot enemies but still aim precisely when the bullets start flying. Based on pro settings and community feedback, here’s a setup that works for most controller players:
- Look Sensitivity: High (4) – Fast enough to turn and react without feeling sluggish.
- ADS Sensitivity: Default (3) – Slightly slower than Look Sensitivity for better control when aiming down sights.
- Per Optic ADS Sensitivity: Off – Keeps aiming consistent across all scopes.
- Response Curve: 8 – Creates a steady, predictable feel, similar to the Classic setting.
Why These Work:
High (4) Look Sensitivity lets you scan your surroundings quickly, which is key in Apex’s fast-paced fights. Default (3) ADS Sensitivity gives you more precision for tracking enemies, especially at mid-range. Turning off Per Optic ADS Sensitivity avoids confusion when switching between scopes—nobody wants to relearn aiming for every gun. The Response Curve at 8 feels smooth and linear, making your stick movements predictable.
How to Set It Up:
- In Settings, go to the “Controller” tab.
- Find “Look Sensitivity” and set it to 4 (High).
- Set “ADS Sensitivity” to 3 (Default).
- Turn “Per Optic ADS Sensitivity” to Off.
- Set “Response Curve” to 8.
Head to the Firing Range and test these settings. Try tracking dummies or sliding around to feel the speed. If it feels too fast or slow, tweak by one level and test again. Patience is key—your muscle memory needs time to adjust.
Fine-Tuning with Advanced Look Controls (ALC)
Want to take your settings to the next level? Advanced Look Controls (ALC) let you customize sensitivity with pinpoint accuracy. It’s like tuning a car: a bit intimidating at first, but the results are worth it. ALCs let you adjust Yaw Speed (horizontal movement), Pitch Speed (vertical movement), Deadzones, and more. Here’s a solid starting point:
- Deadzone: 5% – Start at 0% and increase by 1% until stick drift stops.
- Outer Threshold: 2% – Minimizes lag at the stick’s edges.
- Response Curve: 8 – Steady and predictable, like the Classic preset.
- Yaw Speed: 200 – Fast horizontal turns for quick reactions.
- Pitch Speed: 150 – Slower vertical movement for better aim control (75% of Yaw).
- Turning Extra Yaw/Pitch: 0 – Keeps sensitivity consistent.
- Ramp-Up Time/Delay: 0 – Instant sensitivity transitions.
- ADS Yaw/Pitch Speeds: 150/100 – Lower than hip-fire for precision.
Why Use ALC?:
ALCs give you granular control, letting you tailor sensitivity to your playstyle. For example, higher Yaw Speed helps you flick to enemies behind you, while lower Pitch Speed keeps your aim steady when tracking vertically. The Deadzone setting eliminates stick drift, which is a lifesaver if your controller’s seen better days.
How to Set It Up:
- In Settings, go to “Controller” > “Advanced Look Controls.”
- Set Deadzone to 0%, test in-game, and increase by 1% until drift stops (aim for 5%).
- Set Outer Threshold to 2% and Response Curve to 8.
- Set Yaw Speed to 200 and Pitch Speed to 150.
- Keep Turning Extra Yaw/Pitch and Ramp-Up settings at 0.
- Mirror ADS settings but lower Yaw to 150 and Pitch to 100.
Spend time in the Firing Range tweaking these. If 200 Yaw feels too zippy, drop it to 180. If you’re overshooting vertically, lower Pitch to 120. ALCs are all about experimentation, so don’t be afraid to play around. Pro tip: write down your settings before changing them, so you can revert if things go wonky.
Deadzone and Trigger Settings
Deadzones and triggers are the unsung heroes of controller settings. They prevent annoying issues like stick drift and overly sensitive inputs, keeping your aim smooth.
- Look Deadzone: Small – Registers small stick movements for responsive aiming. Increase to Medium if you notice drift.
- Movement Deadzone: Small – Ensures quick movement inputs. Adjust upward for older controllers.
- Trigger Deadzone: Default – Works for most controllers. Only increase if triggers fire too easily.
Why These Matter:
Look Deadzone controls how far you need to move the stick before the game registers it. A Small setting makes aiming feel snappy, but if your character moves without input (stick drift), bump it up. Movement Deadzone does the same for movement—Small keeps things responsive. Trigger Deadzone stops accidental trigger pulls, which is crucial for precise shooting.
How to Test and Adjust:
- Set both Look and Movement Deadzones to Small.
- In the Firing Range, stand still and see if your aim or character moves on its own.
- If drift occurs, increase Deadzone to Medium and retest.
- Keep Trigger Deadzone at Default unless your triggers feel too sensitive.
Got an older controller? You might need a higher Deadzone. If drift persists even at Medium, it’s time to consider a new controller—check out this guide to the best Apex Legends controllers for recommendations.
Maximizing Aim Assist
Aim assist is a hot topic in Apex Legends, especially after the Season 22 nerf dropped controller aim assist from 0.4 to 0.3 in crossplay lobbies. It’s still a powerful tool, though, and you’ll want to make sure it’s working for you.
- Target Compensation: ON – Enables aim assist for tracking enemies.
- Melee Target Compensation: ON – Helps with melee accuracy.
How It Works:
Aim assist slightly slows your crosshair when it’s near an enemy, making it easier to track them. The nerf means it’s less sticky, so your sensitivity settings are even more important now. Keeping both Target Compensation settings ON ensures you’re getting the full benefit, especially in close-range fights.
How to Set It Up:
- In Settings, go to “Controller” > “Advanced Look Controls.”
- Scroll to “Target Compensation” and “Melee Target Compensation.”
- Set both to ON.
Practice in the Firing Range to get a feel for aim assist. Try hip-firing and ADS-ing at moving dummies to see how it locks on. If you’re struggling post-nerf, spend extra time practicing tracking—this guide on improving aim in Apex Legends can help.
Other Gameplay Settings to Optimize
Sensitivity isn’t the only thing that affects your performance. These gameplay settings can clean up your experience and boost your movement:
- Auto Sprint: OFF – Lets you walk slowly for sneaky plays. Turn ON if your sticks are stiff.
- Taking Damage Closes Deathbox: OFF – Allows armor swaps without interruption.
- FOV Ability Scaling: OFF – Prevents visual clutter, especially for Legends like Octane.
- Sprint View Shake: Minimal – Reduces screen wobble for clearer aiming.
How to Set It Up:
- In Settings, go to the “Gameplay” tab.
- Turn off Auto Sprint, Taking Damage Closes Deathbox, and FOV Ability Scaling.
- Set Sprint View Shake to Minimal.
These tweaks reduce distractions and keep you focused in fights. For example, turning off Taking Damage Closes Deathbox lets you swap armor mid-fight, which can save your skin. Test them in a match to feel the difference.
Testing and Adjusting Your Settings
You’ve got the settings dialed in, but they won’t feel perfect right away. Muscle memory takes time, so here’s how to make sure your setup works for you:
- Hit the Firing Range: Spend 10-15 minutes testing your sensitivity. Shoot dummies, practice slides, and try crouch-spamming.
- Play Casual Matches: Jump into pubs to test your settings in real fights. Focus on how your aim feels in close and mid-range engagements.
- Tweak Gradually: If you’re overshooting targets, lower Look Sensitivity by 1. If you’re too slow, bump it up. Small changes prevent frustration.
- Warm Up Daily: Spend 5 minutes in the Firing Range before matches to get your aim locked in.
Pro players like ImperialHal tweak their settings constantly, so don’t be afraid to experiment. Check out ImperialHal’s controller settings for inspiration.
FAQ
Q: What’s the best controller preset for beginners?
A: Button Puncher is great for beginners. It swaps melee and crouch (R3), making it easier to slide and dodge while keeping things simple.
Q: Should I use ALC settings or stick to defaults?
A: Start with default settings (Look Sensitivity 4, ADS 3) for simplicity. If you want more control, try ALC with Yaw at 200 and Pitch at 150, but test thoroughly.
Q: How do I fix stick drift?
A: Set Look and Movement Deadzones to Small. If drift persists, increase to Medium or consider a new controller.
Q: Does aim assist still work after the nerf?
A: Yes, but it’s weaker (0.3 in crossplay lobbies). Keep Target Compensation ON and practice tracking to compensate.
Conclusion
Getting the best sensitivity settings for Apex Legends on controller isn’t just about copying pro setups—it’s about finding what clicks for you. Start with Look Sensitivity at 4, ADS at 3, and Deadzones at Small for a balanced feel. Experiment with Evolved or Button Puncher presets to boost your movement, and dive into ALC if you’re ready to fine-tune. Don’t forget to keep aim assist ON and test everything in the Firing Range. With a bit of practice, you’ll be hitting headshots and outmaneuvering enemies like a pro. So, what are you waiting for? Jump into Apex, tweak those settings, and start racking up those dubs
For more tips, check out Dot Esports’ Apex Legends guides or Setup.gg’s controller recommendations. Happy gaming!
Ever wondered how to make Cyberpunk 2077 look jaw-dropping on your RTX 3080 without your PC begging for mercy? Night City’s neon-soaked streets deserve to shine, but getting the perfect balance of stunning visuals and smooth performance can feel like cracking a secret code. Don’t worry—I’ve got you covered with a step-by-step guide to the best graphics settings tailored for your RTX 3080. Whether you’re dodging bullets in a high-octane chase or soaking in the city’s vibes, these settings will make your game pop while keeping those frames buttery smooth. Ready to dive in and transform your gaming experience? Let’s do this!
Key Takeaways
- Optimize for visuals and performance: Fine-tune settings to make Cyberpunk 2077 look amazing without tanking your frame rate.
- Leverage RTX 3080 features: Use ray tracing and DLSS to boost graphics quality and smoothness.
- Adjust settings step-by-step: Follow clear instructions to tweak resolution, textures, and more.
- Test and tweak: Experiment with settings to find what works best for your setup.
- Keep drivers updated: Ensure your NVIDIA drivers are current for the best performance.
Quick Answer to Your Problem
To get the best graphics settings for Cyberpunk 2077 on an RTX 3080, set the resolution to 1440p, enable DLSS on Quality mode, turn on ray-traced reflections and lighting, and adjust texture quality to High. This setup balances stunning visuals with smooth gameplay, hitting around 60-80 FPS in most scenes. Below, I’ll walk you through every step to make it happen.
Why Graphics Settings Matter for Cyberpunk 2077
Cyberpunk 2077 is a visual beast. Its sprawling open world, packed with neon lights, reflective surfaces, and bustling crowds, pushes even high-end GPUs like the RTX 3080 to their limits. If your settings are too high, you’ll get choppy gameplay. Too low, and Night City looks like a blurry mess. The RTX 3080 is a powerhouse, but it needs the right tweaks to shine. By optimizing settings, you’ll get crisp visuals, realistic lighting, and smooth performance—perfect for immersing yourself in the game’s gritty cyberpunk world. Curious about how to make it happen? Let’s break it down.
Step-by-Step Guide to Optimize Graphics Settings
Getting the perfect setup is easier than it sounds. Follow these steps to configure Cyberpunk 2077 for your RTX 3080. I’ll explain each setting, why it matters, and how to tweak it for the best results.
Step 1: Update Your NVIDIA Drivers
Before touching the game, make sure your NVIDIA drivers are up to date. New drivers often include optimizations for big titles like Cyberpunk 2077, boosting performance and fixing bugs. Here’s how to do it:
- Open the NVIDIA GeForce Experience app (download it from NVIDIA’s official site if you don’t have it).
- Go to the “Drivers” tab.
- If a new driver is available, click “Download” and install it.
- Restart your PC to ensure the changes take effect.
Updated drivers can squeeze extra frames out of your RTX 3080, so don’t skip this step. Ready for the fun part? Let’s jump into the game settings.
Step 2: Choose the Right Resolution
Resolution decides how sharp the game looks. For the RTX 3080, 1440p (2560×1440) is the sweet spot—it’s crisp without taxing your GPU as much as 4K. Here’s how to set it:
- Open Cyberpunk 2077 and go to Settings > Video.
- Set Resolution to 2560×1440.
- Enable Fullscreen mode for the best experience.
If you have a 4K monitor and want to push the RTX 3080 harder, you can try 4K, but you might need to lower other settings to maintain smooth FPS. Stick with 1440p for now—it looks fantastic and plays smoothly.
Step 3: Enable DLSS for a Performance Boost
DLSS (Deep Learning Super Sampling) is NVIDIA’s secret weapon. It uses AI to upscale lower-resolution images, giving you near-native quality with better performance. For Cyberpunk 2077, DLSS is a game-changer on the RTX 3080. Here’s what to do:
- In Settings > Graphics, find NVIDIA DLSS.
- Set it to Quality mode.
Quality mode prioritizes sharp visuals while boosting FPS. If you notice performance dips in crowded areas, try Balanced mode. DLSS lets you crank up other settings without sacrificing smoothness, so it’s a must. Wondering what to tweak next? Keep reading.
Step 4: Turn On Ray Tracing (But Be Smart)
Ray tracing makes Cyberpunk 2077’s lighting, reflections, and shadows look insanely realistic. The RTX 3080 handles ray tracing like a champ, but it’s demanding. Here’s how to use it wisely:
- In Settings > Graphics, find the Ray Tracing section.
- Enable Ray Tracing.
- Set Ray-Traced Reflections to On.
- Set Ray-Traced Lighting to Medium.
- Set Ray-Traced Shadows to Off (they’re less noticeable and eat FPS).
These settings give you gorgeous reflections and lighting without tanking performance. Medium lighting strikes a balance—High is too demanding for consistent 60 FPS at 1440p. Want to see Night City’s puddles reflect neon signs like a mirror? Ray tracing makes it happen.
Step 5: Adjust Texture and Visual Settings
Textures and other visual effects add detail to the world. The RTX 3080 has 10GB of VRAM, so you can push these settings high. Here’s the breakdown:
- Texture Quality: Set to High. This makes surfaces like walls, clothes, and vehicles look detailed without overloading your GPU.
- Field of View: Set to 80-90 (adjust based on preference). A wider FOV feels immersive but can slightly impact performance.
- Film Grain, Chromatic Aberration, Depth of Field, Lens Flare: Turn these Off for a cleaner image, or keep them on for a cinematic vibe.
- Crowd Density: Set to Medium. High crowds look cool but can cause FPS drops in busy areas like markets.
These tweaks ensure Night City looks rich and detailed without pushing your RTX 3080 too hard. Almost there—let’s fine-tune performance next.
Step 6: Optimize Performance Settings
To keep FPS high, adjust these settings for smoother gameplay:
- Shadow Quality: Set to Medium. High shadows are barely noticeable but hit performance hard.
- Ambient Occlusion: Set to Low. It adds subtle depth but isn’t worth the FPS cost on High.
- Volumetric Fog Quality: Set to Medium. This keeps the game’s misty, neon atmosphere without eating too many resources.
- Screen Space Reflections: Set to High. With ray-traced reflections on, this setting enhances non-ray-traced surfaces.
These settings prioritize performance while keeping the game visually stunning. You’re almost ready to hit the streets of Night City!
Step 7: Test and Tweak
Every PC setup is a bit different, so test your settings in-game. Wander through busy areas like Downtown or do a mission with heavy action to check FPS. Use the in-game FPS counter (enable it in Settings > Interface) or a tool like MSI Afterburner. Aim for 60-80 FPS at 1440p. If you’re dipping below 60 FPS, try:
- Lowering Ray-Traced Lighting to Low.
- Switching DLSS to Balanced or Performance mode.
- Reducing Crowd Density to Low.
If FPS is solid but you want more eye candy, bump Texture Quality to Ultra or enable Ray-Traced Shadows. Play around until it feels just right. Excited to see the results? Let’s wrap up with some extras.
Bonus Tips for the Best Experience
Want to take your Cyberpunk 2077 experience to the next level? Here are a few extra tricks:
- Use a high-refresh-rate monitor: A 120Hz or 144Hz monitor makes gameplay feel silky smooth, especially with the RTX 3080’s power.
- Enable G-Sync: If your monitor supports it, turn on G-Sync in the NVIDIA Control Panel to reduce screen tearing.
- Keep your PC cool: Cyberpunk 2077 is demanding, so ensure your GPU and CPU have good airflow to avoid thermal throttling.
These tips will make your time in Night City even more epic. Got questions? Check out the FAQ below.
FAQ
Q: Can I run Cyberpunk 2077 at 4K on an RTX 3080?
A: Yes, but you’ll need to lower settings like ray tracing to Low or Off and use DLSS Performance mode to maintain 60 FPS. 1440p is better for consistent performance.
Q: Why does my game stutter in crowded areas?
A: Crowded areas stress your CPU and GPU. Try lowering Crowd Density to Low or Medium and ensure DLSS is on to ease the load.
Q: Should I use ray tracing on the RTX 3080?
A: Absolutely! Ray-traced reflections and lighting make the game look incredible. Stick to Medium settings to balance visuals and performance.
Q: How do I check my FPS in Cyberpunk 2077?
A: Go to Settings > Interface and enable the FPS counter. Or use external tools like MSI Afterburner for more detailed stats.
Conclusion
Setting up Cyberpunk 2077 on your RTX 3080 doesn’t have to be a headache. By following this guide—updating drivers, picking 1440p, enabling DLSS, tweaking ray tracing, and fine-tuning textures—you’ll get a gorgeous, smooth gaming experience. Night City’s neon glow and gritty streets will come to life without your PC breaking a sweat. Test your settings, play around, and find what makes the game sing for you. Now, grab your controller or keyboard, dive into the cyberpunk world, and let the RTX 3080 show you what it’s made of. Happy gaming!
For more gaming tips, check out IGN’s Cyberpunk 2077 guides or NVIDIA’s performance tips.
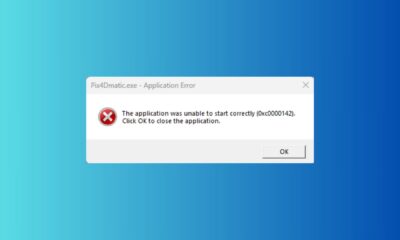

How to Fix 0xc0000142 Error on Windows 10: Easy Step-by-Step Guide
Ever fired up your favorite game, only to get slapped with the frustrating 0xc0000142 error on Windows 10? It’s like...


What affects aim accuracy in Apex Legends?
Key Points Factors Influencing Aim Accuracy Aim accuracy in Apex Legends depends on several factors, and understanding them can help...

Best Sensitivity Settings for Apex Legends on Controller
Ever landed in Apex Legends, ready to dominate, only to miss every shot because your aim feels like it’s stuck...

 Games Like2 years ago
Best Games Like Unblocked Games 77 | Top Alternatives
- Gaming1 year ago
Free Fire Best Sensitivity Settings For Headshot
- Top 102 years ago
The Top 20 Android Horror Games to Play with Friends

 Game Room Ideas11 months ago
52 Incredible Game Room Ideas to Elevate Your Home Entertainment
- Tutorials2 years ago
How to Fix the PS5 Green Screen – Tips To Try
- Tutorials11 months ago
How to Play Fishbowl Game: Rules, Regulations, and Tips
- Top 1011 months ago
10 Best Offline Mobile Games For Long Car Rides 2024
- Tutorials12 months ago
Yandex Games Progress Lost? Here’s How to Recover and Prevent Future Issues